Category: Hiking

Tips To Help Busy Mums Find Time To Exercise

Most mums can’t even go to the bathroom without an audience, so finding spare time to stick to an exercise regime can be impossible. The good news is, busy mums can find time to exercise by thinking out of the square.

7 Ways Busy Mums Can Find Time To Exercise

I have three children who are all at home with me. We have an abundance of chores, doctor’s appointments, household duties and all the rest, so I have had to become very strict with myself.

Without organisation it would be impossible to ensure I manage some exercise in to my daily routines, here is how I do it.

7 Ways Busy Mums Can Find Time To Exercise

1. Start Early

With kids who rise early and normally a full to the brim day ahead, I find the best time to squeeze in a workout is before the day begins. You can be finished before mid-morning and utilise that time in the mornings that is often slow moving. You still have a day ahead to tick off your to-do list!

2. Schedule

Like most things in our lives, the best way to ensure exercise is to schedule it in each week. Put it in your calendar at the beginning of each week, choose your workout of choice and then just do it. No excuses!

3. Involve The Kids

If you can’t get away from the kids to work out in peace, then include them. Babies can be used as the perfect weight to squat with. Your local park makes for a free and fun gym.

Strap your baby to your back and climb the stairs. Run with your toddler in the pram. Like to swim? Have your toddler hold on to your shoulders while you breast stroke through your laps! There are ways to make this work.

4. Utilise The Creche

Whether this is at your local gym or finding a trainer who includes the kids in their program, or trainers that provide babysitting services – use it!

My kids go to the creche at the local gym, they love being with their friends and I love the 90-minutes of guilt-free me time.

5. Try A Two-Minute Workout

Exercising doesn’t necessarily have to be in an hour block. It can be two minutes here and two minutes there. While unpacking the dishwasher I hit the squats and calf raises.

When hanging the washing, I get some extra steps taking each item individually out to the washing line. While play Lego I manage some leg raises. Time for Facebook? Time for crunches!

6. Choose Your Workout!

Now that you’ve scheduled your time in, what are you going to do? Be prepared and know what you are going to do ahead of time. Or sign up to our challengeand then download our app and we can tell you exactly what to do each day!

7. Just Do It!

It is so easy to make excuses to avoid exercising! But our children should not be our excuse, they should be our reason to live a healthy life!

Source: www.healthymummy.com


Guida al Trekking: 9 consigli per principianti

Sei un escursionista alle prime armi?

Ami la natura e ti piacerebbe vivere il piacere di un viaggio lento tra i boschi, sulle montagne, magari alla scoperta di qualche piccolo borgo che custodisce la storia e le tradizioni della nostra penisola?

Ecco per te alcuni consigli per fare in modo che il tuo trekking sia piacevole e sicuro, la prima di una lunga serie di escursioni sui sentieri.

1. Comincia piano

338098-hiking
Sei alla prima escursione o giù di lì?
Bene. Non è il caso di iniziare con l’Appalachian Trail.
Quanto sei allenato? Cammini tutti i giorni?
Vai a lavorare a piedi o il tuo trail più lungo va dal salotto alla cucina?
Sii sincero con te stesso. Come si dice, non fare il passo più lungo della gamba.
Comincia con una piccola escursione, poi si vedrà, usa il buon senso.

2. Informati sul tuo itinerario

Bussola
Una volta scelto l’itinerario, cerca informazioni sul percorso.

Dai soprattutto un’occhiata alla segnaletica, al dislivello, al periodo consigliato, alla durata del percorso.
Acquista una guida affidabile, trova una mappa che descrive l’escursione, cerca nei forum su internet e soprattutto cerca il tuo trekking nella nostra sezione itinerari!

Non hai che l’imbarazzo della scelta.


3. Controlla il meteo

Questa è la prima e fondamentale cosa da fare, una volta stabilita la data e il luogo del tuo trekking.
Controllare le previsioni del tempo ti consente di pianificare il tuo itinerario, scegliere con cura l’abbigliamento, decidere cosa mettere nello zaino.

Sul web puoi trovare molti servizi meteo, la maggior parte sono affidabili, noi ti segnaliamo il Servizio Meteo dell’Aeronautica Militare.

Ricorda che tanto più le previsioni sono a lungo termine, tanto meno sono precise.

Se il meteo è sfavorevole, sarà il caso di cambiare i tuoi piani e rimandare il tuo trekking.

Ricorda, la prima regola è: rispetta la natura, non sfidarla, ci saranno occasioni migliori per il tuo itinerario.

Se cerchi un’App meto per avere le informazioni direttamente sul tuo smartphone, leggi questo articolo:
Che tempo che fa per camminare? A dirvelo sono le App Meteo

4. Se vai da solo, comunica a qualcuno dove andrai

tip

Fare trekking in gruppo o con gli amici è una avventura meravigliosa, che consente di vivere il viaggio lento con persone che condividono le nostre passioni e potenziano l’emozione della nostra esperienza.

A volte però è bello anche avventurarsi da soli nella natura, per ascoltare il silenzio dei boschi, assaporare pienamente la montagna e stare con sè stessi.

Si può fare, è una tua scelta.

In questo caso però, dì a qualcuno dove andrai, meglio ancora se si tratta di un amico escursionista che conosce quel percorso. In caso di problemi, potrà aiutarti.

Anche qui la tecnologia può venie in supporto dell’escursionista, grazie alle App per la scurezza e il soccorso.

5. Prepara lo zaino, ma non esagerare


Se sei alle prime escursioni, il tuo zaino sarà leggero, non avrai bisogno dell’attrezzatura e del kit di sopravvivenza necessario per una scalata al K2, però alcune cose non possono mancare:

  • acqua abbondante
  • cibo
  • un kit minimo di primo soccorso
  • a seconda della stagione, protezione solare e eventuale abbigliamento adeguato

6. Le scarpe sono importanti

tips scarpe

Sembra banale, ma ricorda che cammini con i piedi.

Il comfort delle tue estremità inferiori è la prima cosa da tenere a mente per la tua esperienza outdoor.
Scegli un buon paio di scarpe e di calze per il trekking.

trekking.it

Hiking for Beginners: 10 Essential Tips

Hiking is an excellent low-impact workout. Studies show it offers multiple physical and mental benefits. From reducing anxiety to preventing osteoporosis, hiking is an outdoor activity delivering benefits beyond scenic and fun.

Unlike walking on a treadmill or paved path, hiking involves more, sometimes unpredictable, variables. Of course, these variables are part of what makes it so enjoyable! Use the following hiking tips to make your first treks successful:

Hiking for Beginners: 10 Essential Tips

1. Start small and choose the right trail for your fitness level.

Select a hike a little shorter than the distance you can normally walk on a level or paved surface. To estimate the time required to hike the trail, figure a pace of roughly 2-miles per hour. Next, review the elevation changes and add an hour to your estimated hiking time for every 1000 feet of gain. After you’ve been out once or twice, you’ll have a sense for what distance and elevation changes work well for you.

2. Familiarize yourself with the trail.

Once you have selected a trail, obtain a map of the area and review reports and data. There are some excellent online resources available. Find out if the trail is a loop, or if you’ll have to backtrack or spot a second car. Take note of any intersecting trails where you could potentially make a wrong turn. I also like to look for a good lunch spot such as a lake or peak with a view.

3. Check the weather.

Leading up to your hike, and again a few hours before, check the weather. This will give you valuable information on how to dress and what to pack. If the weather is forecast to be awful, it will give you the chance to change plans instead of getting surprised on the trail.

Hiking for Beginners: 10 Essential Tips

4. Tell someone where you will be.

It’s important that someone not on the hike knows the itinerary and what time to worry and call for help. Note I didn’t say, “when you expect to be done.” The “worry time” may be several hours later than your planned finish to allow for slow hiking, amazing views, or perhaps a sore ankle causing a delay.

Another option is to carry an emergency device such as the SPOT tracker, which allows you to summon emergency assistance by satellite. One caveat, devices like the SPOT are not an excuse to shirk responsibility for your own personal safety – they are a backup.

5. Pack the 10 essentials.

The 10 essentials have gradually shifted from a list of items to a list of systems. These are the systems you should pack to stay safe in the outdoors, including facing a potential overnight. Depending on the length and remoteness of your hike, expand or minimize each system. For example, on a short summer hike near services, a compact emergency blanket should be fine. However, a remote winter hike would require something more extensive. Here are the 10 essential systems:

Ten Essential Systems

  • Navigation (map & compass)
  • Sun protection (sunglasses & sunscreen)
  • Insulation (extra clothing)
  • Illumination (headlamp/flashlight)
  • First-aid supplies
  • Fire (waterproof matches/lighter/candle)
  • Repair kit and tools
  • Nutrition (extra food)
  • Hydration (extra water)
  • Emergency shelter (tent/plastic tube tent/garbage bag)

This list may look daunting, but once you tailor it to your hike, it won’t be so bad. Many of these things are what you’d pack for a picnic. Visit Mountaineers Books for more details.

Hiking for Beginners: 10 Essential Tips

6. Wear the right shoes and socks.

Painful feet can ruin a hike. Invest in quality hiking shoes and socks. This doesn’t mean heavy leather boots, there are a lot of “light hikers” available that require little break-in compared to the old hiking boots I started with. Also, don’t skimp on socks and for goodness sake….no cotton! Wool or synthetic socks are the way to go. Also pack blister dressings just in case.

7. Dress for success.

Once your feet are taken care of, dressing right is key to comfort on your hike. Skip cotton anything, it gets damp and stays that way leaving you feeling clammy and causing chafing. Instead go for synthetics. To easily adjust for your temperature and the weather, wear layers that you can add or shed as needed. Lastly, pack an extra warm layer beyond what you think you’ll need, preferably something that will block wind too.

8. Keep it light.

Okay, now that I’ve told you to pack all of this stuff, I’m going to tell you to keep your pack light. This means opting for the lightest of each item. For example, a travel size tube of sunscreen instead of the NoAd 16-ounce tube you found on sale.

Hiking for Beginners: 10 Essential Tips

9. Pace yourself.

When you first get on the trail, you may feel like powering forward like a hero. However, you’ll be a zero by the end of the day if you don’t pace yourself. Instead, pick a pace you can maintain all day. It might feel a little awkward at first, but after a few miles, especially uphill, you’ll be glad you saved your energy.

10. Leave no trace.

The beautiful trails we love will only stay beautiful if we care for them. Take time to read the Leave No Trace Seven Principals and follow them. It’s up to every outdoor enthusiast to take care of our natural spaces.

Using these tips I hope you’ll get out hiking this season. Where will you go? Leave a comment to share your ideas; I’d love to hear them!

Source: blog.liftopia.com

SENDERISMO CON NIÑOS: Cómo caminar por distintos terrenos

Senderismo con niños: Cómo caminar por distintos terrenos

“Caminar con niños por terrenos sencillos”

¿Cuántas veces nos hemos fijado al escoger una ruta sólo en la distancia que tiene? ¿Sin prestar atención al tipo de terreno por el que transita?.

En nuestro caso, nos ha pasado más de una vez… Nos encontramos con un recorrido de apenas 3 km y tardamos en hacerlo casi 3 horas…

El tipo de terreno va a condicionar en gran medida las excursiones con niños.

En este primer artículo, nos centraremos en lo que llamaremos terreno sencillo, pues no presenta demasiada dificultad, ni peligros graves en su discurrir.

Cuando realizamos salidas al campo con niños, transitaremos en la práctica totalidad del recorrido por este tipo de terrenos fáciles. Van a ser distintos medios que presenten poca severidad o dificultad en el avance de la marcha, y, en general, van a permitir avanzar con cierto relajo y disfrute.

  • Carreteras:

Senderismo con niños: Cómo caminar por distintos terrenos

Es un terreno a evitar, pero muchos senderos balizados cruzan carreteras y otros, incluso, circulan algunos kilómetros por ellas. Se debe ir en fila de uno por la izquierda, un adulto delante y otro atrás. Si los niños son pequeños, de la mano y por el lado de fuera de la carretera. En vías secundarias se suele descuidar mucho este aspecto, confiando en que casi no pasan coches, pero hay que ir pendientes y llevar a todo el grupo junto y dispuestos a echarse al lado izquierdo a la mínima sospecha de que se acerca un vehículo.

  • Pistas:

Senderismo con niños: Cómo caminar por distintos terrenos

Es un terreno por el que los niños caminan bien. Tienen el inconveniente, de que, si el tramo es largo, pueden caer en la monotonía (y si los niños se aburren dicen que están cansados), y otro posible problema es la exposición al sol en zonas altas. Cuidado con otros usuarios (quads, motos, bicis de montaña) que a veces circulan a bastante velocidad, como si no fueran a encontrar a nadie. También hay que prestar atención en épocas de caza, si hay alguna batida, informarse antes de hacer la ruta y en caso de coincidencia con la cacería intentar cambiar de ruta.

  • Senderos:

Senderismo con niños: Cómo caminar por distintos terrenos

Es el terreno ideal para nuestras excursiones. Muchas veces los niños quieren ir en paralelo, y, a veces, el camino es estrecho (ir haciendo turnos para ir en cabeza, y así, evitar posibles disputas). Igualmente, os dirán que quieren ir corriendo, y si el terreno lo permite no hay ningún inconveniente. Evitar los atajos y enseñar a subir despacio (aunque esto no va con el espíritu aventurero y explorador del niño). Deben aprender a esperar siempre que exista un cruce de caminos (además los responsables procuraremos no perderles de vista nunca, aunque les dejemos ir delante “explorando”).

  • Campos y praderas:

Senderismo con niños: Cómo caminar por distintos terrenos

Las praderas son un terreno estupendo para caminar con los niños, les encanta moverse con libertad por ellas. Debemos tener precaución si la pradera presenta hoyos ocultos por la hierba, bien por la presencia de arroyos, o por tener algo de desnivel en algunas zonas.Senderismo con niños: Cómo caminar por distintos terrenos

Hay que prestar atención si hay ganado suelto en ellas para que no asusten a los niños (basta con ir cerca de ellos), y para evitar que los niños asusten al ganado. Más cuidado hay que tener si advertimos la presencia de perros cuidando ese ganado, en ese caso, los niños deben ir a nuestro lado, de la mano y mantener la calma si se acercan los perros. Normalmente si nos ven pasar sin molestar al rebaño, y caminamos tranquilos, nos dejarán en paz, no obstante, si observamos un comportamiento excesivamente agresivo y territorial al acercarnos y no vemos al pastor en las inmediaciones, es mejor dar marcha atrás (sin correr, todo animal que ve una conducta de presa, actúa como depredador) y buscar una alternativa distinta para el paso.

Zonas de cultivo:

Senderismo con niños: Cómo caminar por distintos terrenos

Si hacemos una excursión fuera de sendero y por algún motivo (despiste casi siempre) debemos atravesar un huerto o sembrado, siempre lo haremos por un lateral, en fila de uno y procurando no pisar, ni destrozar nada. No debería hacer falta decirlo, pero también debemos mostrar respeto por la propiedad ajena, las cerezas cogidas del árbol están muy buenas, pero si están en una finca atendida, tienen dueño que trabaja y las mantiene.

  • Bosques:

Senderismo con niños: Cómo caminar por distintos terrenos

Si atravesamos un bosque con sendero trazado, sólo deberíamos tener cuidado con las ramas que quedan a la altura de la mochila si porteamos al niño en ella. Las raíces en el suelo pueden ocasionar algún resbalón si están húmedas y tropezones si vamos descuidados, pero en general, el suelo mullido y la variedad de estímulos, convierten a los bosques en terrenos estupendos para nuestras excursiones. Si atravesamos un bosque sin sendero, debemos tener cuidado con las piedras y posibles hoyos tapados por la hojarasca que cubre el suelo. Si el bosque está cerrado de matorrales su paso puede ser una auténtica odisea, conviene rodearlo.

  • Zonas de matorral:

Hay que tener cuidado, pues, algunas zonas de tránsito estrecho y difícil para nosotros son intransitables para los niños. Cuidado al apartar las ramas para pasar, nunca se deben soltar de golpe, si no avisar al que viene detrás para que la sujete. Probablemente nos hayamos salido del camino, si nos encontramos en esta tesitura, por lo que quizá, lo más sensato sea buscar una alternativa menos cerrada de maleza volviendo atrás. No obstante, algunas sendas atraviesan zonas de piornos y no queda más que armarse de paciencia y buscar el mejor paso.

  • Playas y zonas de arena:

Les encanta, acabarán mojados sea cual sea la época del año (así que no te enfades, prevéelo). Cuidado cuando el recorrido es largo, vaciar de arena el calzado, cada poco tiempo (si es que consigues que sigan calzados, pero si el calor aprieta, debes insistir para evitar problemas en los pies). Se camina mejor por el borde del agua donde la arena está húmeda, ya que, soporta el peso sin hundirnos.

11 Reasons Why You Should Go Hiking In Nature This Weekend

Going on a hike is of course fun but it’s also awesome for your health. Here’s some science to prove it

Hiking is fun and is a great travel experience, but walking is also an awesome way to immerse yourself in nature for a day; and a super easy microadventure that you can have on the weekend, to escape the grind and refresh the hell out of yourself for Monday morning.

Still need convincing? Here are 10 nuggets of science that very much prove it’s time to get your hike on.

10 cose che ogni escursionista dovrebbe sapere sul fitness!

Il trekking è scoperta ma anche un’attività fisica

escursionista

Camminiamo per conoscere, per viaggiare, per andare alla scoperta del mondo che ci circonda, questa è la filosofia che sta alla base della nostra community.

Non possiamo però perdere di vista che si tratta comunque di un’attività fisica che deve essere affrontata con la giusta preparazione e con un occhio di riguardo per il nostro corpo.

In questo articolo parliamo di alcuni punti fermi che non possono essere ignorati da chi ama camminare, sono temi magari più affini al mondo del fitness, ma in fondo non è anche il trekking un modo per stare bene o in forma?

Noi crediamo di si.

1. Meno ma spesso: un principio che vale anche per il cammino

Se vogliamo allenare la gamba per i nostri trekking più impegnativi o per i nostri viaggi zaino in spalla dobbiamo seguire un programma di allenamento basato proprio sul cammino.

Camminare ogni tanto e farlo fino allo strenuo delle vostre forze non ha alcuna utilità, se non quello di farvi svegliare il giorno dopo completamente bloccati, costretti a saltare gli allenamenti dei giorni successivi.

È decisamente meglio iniziare lentamente e progredire costantemente nel corso dei mesi piuttosto che esagerare all’inizio, anche se vi state preparando ad un cammino o ad un viaggio a piedi di più giorni.

Abbiamo dedicato già un articolo all’allenamento per il trekking con un programma dettagliato, il principio è di iniziare camminando 20 minuti al giorno e incrementare lo sforzo, quindi durata e dislivelli, del 10% ogni settimana, in questo modo sarete preso pronti per il vostro viaggio.

2. Dovresti usare un rullo di gommapiuma …

Questo attrezzo è utile per esercitare una pressione costante e delicata sulla nostra muscolatura, un movimento che aiuta ad allentare la tensione muscolare dopo uno sforzo prolungato.

Tutto questo si traduce in tempi di recupero più rapidi e in una riduzione del rischio di lesioni durante l’allenamento, prima, e il trekking, poi.

Tra i muscoli che rispondono meglio a questa stimolazione troviamo i polpacci, i muscoli posteriori della coscia e il quadricipite, durante il trattamento soffermatevi per 30 – 90 secondi sui muscoli che percepite più contratti.

Questa tecnica può essere utilizzata anche in caso di emergenza durante il trekking, se sentite il muscolo diventare rigido, interrompete la camminata e utilizzate, per esempio, una bottiglia piena da un litro per massaggiare la zona interessata.

3. Gli allungamenti sono noiosi ma essenziali

Lo stretching dopo un’escursione riduce il rischio di lesioni, può aiutare a prevenire gli squilibri muscolari e accelera il processo di recupero.

Questo consiglio vale sia per i vostri allenamenti quotidiani che per i vostri trekking più lunghi o per le tappe del vostro viaggio.

Quando tornate alla vostra auto dopo il cammino dedicate qualche minuto all’allungamento, con particolare attenzione per i muscoli più sollecitati, come i polpacci, i quadricipiti, i muscoli posteriori della coscia e i flessori dell’anca.

4. Meglio prevenire che curare: il riscaldamento

Anche questa è un prassi necessaria sia per l’allenamento che per i trekking veri e propri, infatti il riscaldamento può fare davvero una grande differenza nella prevenzione degli infortuni.

Ecco alcuni esercizi da fare prima di iniziare a camminare:

  • Affondi alternando gamba destra e sinistra.
  • Piegamenti con le gambe parallele,  meglio se a piedi nudi, in questo modo si rafforzano anche le caviglie.
  • Sollevamenti sulle punte dei piedi.

5 Migliorare l’equilibrio aiuterà a prevenire le lesioni.

Tra gli infortuni più comuni di chi cammina e fa trekking troviamo le distorsioni alla caviglia, ecco perché è importante lavorare su questo legamento per rafforzarlo durante gli esercizi settimanali.

Uno dei migliori è proprio quello di abituare la caviglia a “lavorare” in una condizione di instabilità, per abituare la muscolatura della gamba a sostenerla in condizioni di stress, in questo modo riusciremo a proteggere meglio la caviglia dalle distorsioni.

In questo articolo sulla preparazione fisica per il trekking vi consigliamo alcuni esercizi adatti per rafforzare la caviglia e non solo.

6. Dovresti rafforzare il tuo nucleo.

C’è un nucleo dal quale inizia tutto il nostro movimento, è quello che comprende i muscoli dei fianchi, delle gambe e della vita.

Per questa ragione è importante prestare particolare attenzione al rafforzamento di queste aree, infatti un nucleo forte favorisce una corretta postura, migliora la respirazione e riduce il rischio di distorsioni della caviglia e dolore al ginocchio.

Per farlo prova esercizi come lo squat, gli affondi a gambe alternate, la tavole  propriocettive, in questo articolo dedicato alla preparazione al trekking ne parliamo meglio.

7. L’allenamento per la forza ti renderà un escursionista migliore.

Abbiamo parlato prima di movimenti funzionali come squat, affondi, step-up e deadlifts, utili perché simulano i movimenti che ci troveremo a compiere sul sentiero, ma possono essere utili anche per lavorare sulla forza.

Infatti eseguendo questi movimenti con i pesi in un ambiente controllato, le articolazioni possono essere soggetti a movimenti completi incrementando la forza e la stabilità.

Ancora un esempio di razione dell’escursionista, con cioccolato, frutta, pane integrale e frutta secca.

8. L’importanza dell’idratazione

L’ideale è bere tra il mezzo litro e il litro di acqua all’ora durante il trekking, ovviamente bisogna tenere in considerazione la sudorazione e la temperatura e il tipo di percorso che stiamo facendo.

L’acqua non basta, infatti con la sudorazione non perdiamo solo liquidi ma anche sali minerali che devono essere reintegrati, per questo è necessario utilizzare integratori alimentari, soprattutto quando camminiamo d’estate con temperature alte.

9. Il tuo cibo è il tuo carburante

Il sentiero non è certo il luogo giusto per stare a dieta, è importante avere un costante apporto calorico, ogni ora bisognerebbe assumere dalle 100 a 200 calorie, utile a mantenere i livelli di zucchero nel sangue stabili.

I pasti da consumare in cammino devono essere completi e contenere grassi, carboidrati e proteine.

10. Aggiungi un allenamento ad intervalli per schiacciare le colline.

Allenamento a intervalli significa camminare alternando tratti alta intensità a periodi di recupero a passo più blando.

Questo tipo di allenamento vi prepara ad affrontare i dislivelli che si trovano lungo i sentieri, ne parliamo in maniera approfondita in un articolo che abbiamo dedicato alla preparazione atletica per il trekking.

日本でハイキング (1):日本の山とその魅力について

日本にある観光名所を一通り訪れた後、さあ、次は何をしようと考えると頭に思い浮かぶのは何でしょう?例えばハイキングでしょうか。大自然を満喫するだけでなく独特な文化にも触れられることから、日本でのハイキング・登山は旅行の目的として注目されています。

知っておきたい日本の山の特徴

ハイキングは旅のハイライトにもなる魅力的なアクティビティ。山でのハイキングをより楽しむために知っておきたい日本の山の特徴をまとめてみました。

日本は山地が多く、ハイキングコースが整備されている山が多い。

日本の国土は約70%が山地です。多くの都市は山々に囲まれた環境にあります。例えば東京都でさえ西部地域は山岳地帯であり、都心から電車で1時間ほど行けばハイキングが楽しめます。観光地の近くでもハイキングができる場所は比較的に容易に探せるので、観光+ハイキング(ウォーキング)+温泉or旅館滞在という組み合わせで、日本ならではの旅を計画できます。


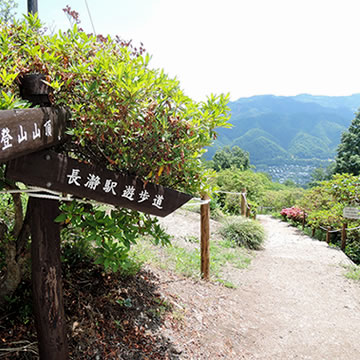
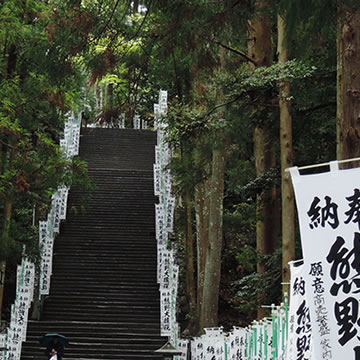
秩父、宝登山のハイキングコース

Tsukubasan (Mt Tsukuba)
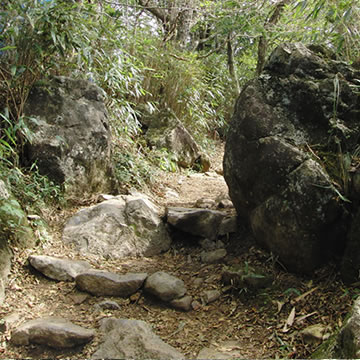
茨城県、筑波山の山道はたくさんの大岩が。

初心者から上級者向けハイキングコース多数あり。

ハイキングコースは数百メートル級の小さい山から数千メートル級の大きな山に整備されています。日帰りで行けるハイキングコースから本格的なトレッキングまで多様です。

数百メートル級の山には初級者~中級者向けのハイキングコースがあります。遊歩道が整備されているので年配のハイカーにも向いています。例えば、富士山の周辺にある山々にはこの様なハイキングコースが多く、道中や山頂から眺める富士山の絶景が大きな魅力となっています。人によっては口にする「富士山は登る山でなく、眺める山だ。」という言葉の意味を体感できるコースです。

1000m以上の高い山は中級~上級者向けです。日本で一番高い山は富士山の3779m、次いで高いのは北岳の3193mです。本州の中央辺りに位置する日本アルプスには北岳をはじめとする2000m~3000m級の山が連なっており、夏にはクライマーで賑わいます。
アメリカ大陸のロッキー山脈には及ばない高さではあるものの、起伏に富んだ環境と険しさがあります。2000m以上の山はハイキングでなく本格的な登山:クライミング・トレッキングと考えるべきです。観光旅行との組み合わせで行くとするなら、ロープウェイで行ける場所がお勧めです。

Kiso Komagatake
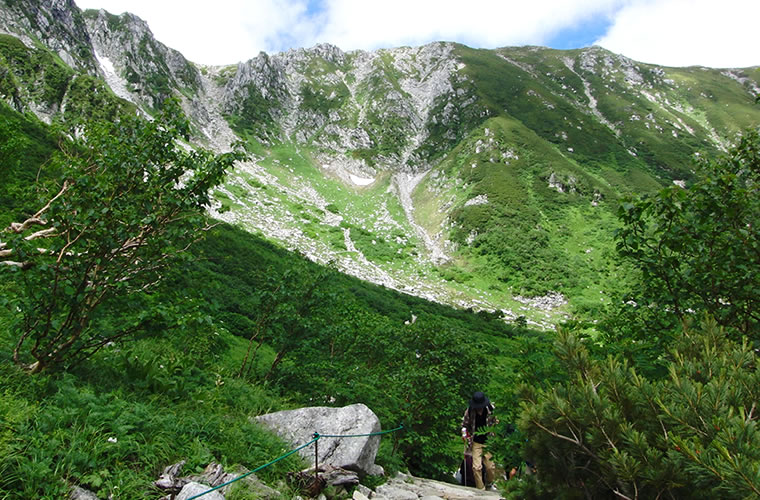
木曽駒ケ岳の千畳敷カール

日本の山は火山が多い

1500mを超える*山の多くは火山です。(*目安です。それより低くても火山の山は多数あり。)荒涼とした火口の迫力には怖さを覚えつつもゾクゾクと魅了されるものがあります。有名な山の多くは火山であり、その一つには富士山が挙げられます。以前、富士山は休火山とされていましたが、噴火の危険がないと勘違いされることがあるため、現在は活火山とされています。火山活動は気象庁が観測し、情報を発信してくれていますが、いつ噴火するかは100%予測できるものではありません。火山を登るにあたっては、ハイカー自身の相応の準備と心構えが求められます。尚、火山な危険な状態になると、入山禁止となります。

火山の恩恵で近くに温泉がある

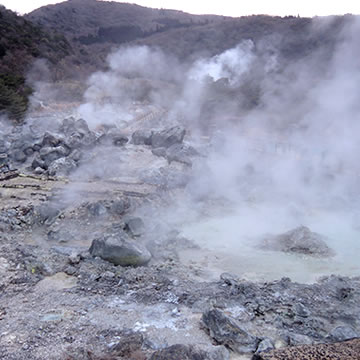
日本には温泉が湧きでる場所が数多く点在しており、ハイキングコースが整備されている山の近辺にはたいてい温泉(街)があります。ハイキングが目的であっても、温泉は外せないというハイカーは少なくありません。ハイキングの後に温泉に立ち寄って疲れた体を癒す、あるいは、ちょっと贅沢な旅館に泊まって食事と温泉を堪能する、というのがハイキング旅行の楽しみ方のひとつとなっています。

Unzen
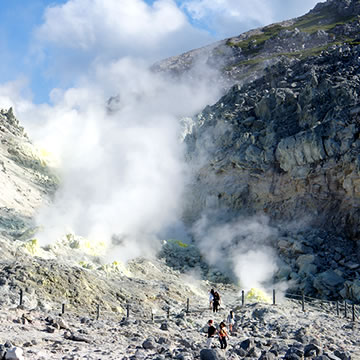
北海道、硫黄山

Unzen
北九州、雲仙温泉

多種多様な樹木と季節で変わる山の風景

日本は南北に長い島国であるため、北部は亜寒帯で南部は亜熱帯とように気候は様々です。
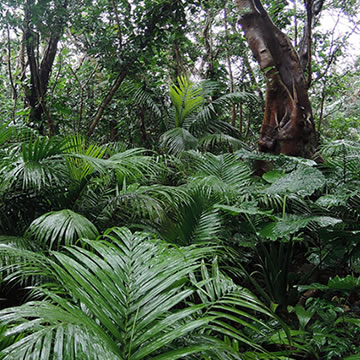
針葉樹から広葉樹まで、多様な植物に出会えます。北部や標高の高い地域では寒い地方独特の樹木が自生しており、東南アジアからの旅行者には珍しい景色と目に映ります。ヨーロッパからの旅行者にとっては南部の沖縄に自生するヤシの木やマングローブが珍しく映るはずです。また、日本は四季がはっきりしており、秋の紅葉、春の新緑といった具合に、訪れる季節によって違う景色のハイキングが楽しめます。


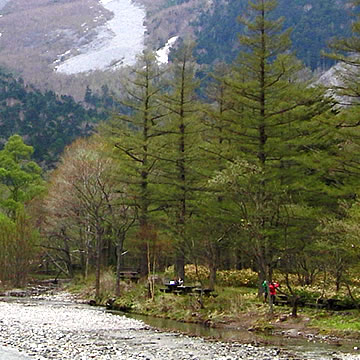
長野県、上高地

Okinawa Ishigaki Island
沖縄、石垣島

山岳信仰と深く結びついた山が多い

日本の山の多くは神と崇められ、山岳信仰は長い歴史の中で変化しながら日本の文化と交わってきました。多くの山は霊峰と呼ばれ、信仰の対象となっています。 その概念を理解するのはちょっとややこしいものがあるので、山岳信仰の捉え方を(主観的に)ざっくりと3つに分けてみました。

1.山自体を神と崇める信仰 (アニミズムanimism)

古来より日本では、自然界の木や岩や山などには神が宿ると考えられています。山そのものが神という考え方です。

この考えに基づき、山の頂上には神様を祀る小さな祠があります。大きさは様々ですがH1m x W1m程度です。山頂まで登ってきたハイカーたちの多くは、この祠を見ると無事に登頂できた悦びを感じ、感謝します。そして、無事に下山できることを祈って下山していきます。

2.神様が鎮座する場所として山を崇める信仰

ギリシャ神話のストーリーのように、日本の神話にも多くの神様が登場します。それら神々は神道という信仰と結びついて崇められ、神社で祀られるようになりました。神道において神話に出てくる神様は日本各地に住んでいるとされ、神様が鎮座している山には神社が建立され、崇拝の対象となりました。

例えば富士山の頂上には浅間大社という神社があります。この神社に祀られているのは「木花咲耶姫コノハナサクヤヒメ」という女神です。この姫にはお姉さんがいます。磐長姫命(いわながひめのみこと)という女神で伊豆半島の南西に烏帽子山に鎮座しています。

山の神様は女神とされています。女性が山に登ると山の神様が嫉妬して災いを起こすと言われ、昔は女人禁制の山が多くありました。19世紀初頭、初めて富士山に登った日本人女性は男性に変装して登ったそうです。

3.修行の場所

山岳信仰は仏教徒とも習合し、修行道にも発展しました。険しい崖を登る、滝に打たれるというような過酷な修行によって心身を鍛錬するというものです。修行者は山伏と呼ばれ、独特の白装束姿をしています。忍者を白く、且つ、ちょっと派手したような装束です。修験道を体験できる山は今でもあります。極めて過酷なので自己責任の修行です。ヨーロッパで増えている若者の巡礼と同様に、宗教的な理由というよりも自分探しを目的に体験したい人が増えています。

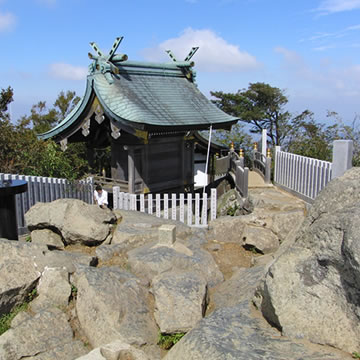
Tsukubasan
筑波山山頂の祠

Wandertipps für Jedermann

Wanderwege laden in aller Welt zum aktiven Naturerleben ein. Egal, ob als Spaziergang mit Kind, Schwiegermutter, Erbonkel oder für die Bergfexe, die es anspruchsvoll lieben: Wandern zählt bei vielen Menschen zu den beliebtesten Freizeitbeschäftigungen.

Kết quả hình ảnh cho Wander Tipps

Als erster historisch doku­mentierter “zweckfreier”Wanderer gilt der Italie­ner Francesco Petrarca, der 1336 mit seinem Bruder den Mount Ventoux (1.900 m) be­stieg.

Über viele Jahrhunderte nach ihm sind nur wenige wei­tere Wanderungen dieser Art dokumentiert. Die neue Art der Fortbewegung, das Wandern, wurde zum Symbol der aufklä­rerischen Emanzipation des Bürgertums vom Adel im 18. Jahrhundert. Danach übernah­men die Romantiker das Wan­dern und prägten das Bild bis heute.

Der Alltagsstress lässt heut­zutage viele Menschen in die Natur aufbrechen. Die Route geplant, den Rucksack gepackt, die Wanderschuhe in das Auto – und ab geht es in die Freizeit. Weg von der Hektik, intensives Erleben der Natur, Vogel- und Wildbeobachtung – ohne an den Ärger im Büro zu denken. Wan­dererherz, was gibt es Schöne­res? Egal, ob Nacht-, Nackt-, Nordic-, Berg- oder Fernwande­rungen. Für jeden Geschmack ist etwas dabei. Es muss ja nicht gleich der Jakobsweg in Spa­nien sein, für den sich die Pilger vier bis fünf Wochen Zeit neh­men müssen…

Wie wandere ich richtig?

Wander­tipps, damit Sie Ih­ren Ausflug richtig genießen können:

  • Passen Sie Ihre Tour an die eigene Kondition an
  • Keine Wanderung ohne genaue Pla­nung!
  • Nehmen Sie die passende Ausrüstung mit – nichts Unnötiges einpacken
  • Informationen über die Tour und Wetterverhältnisse einholen
  • Rechtzeitig eine Rast einlegen (min­destens alle zwei Stunden eine Zehn­minutenrast einle­gen)
  • Während der Tour ausreichend trinken und essen
  • Niemals den mar­kierten Weg verlassen
  • Bei Gefahr oder Wetterverschlechte­rung die Tour recht­zeitig abbrechen
  • Eine Notfallaus­rüstung (Erste-Hilfe­-Box, Taschenlampe, Handy) gehört in je­den Rucksack.

www.wandern.com

Training for Hiking

 Two hikers climbing up a rocky hill with a beautiful view of the valley behind them.

You might be asking yourself, “Don’t you just train for hiking by going for a hike?” That’s one way to do it, but if you’re getting back into hiking after taking a season or two off or you aspire to hike longer distances and reach loftier summits, proper training becomes ever more important.

In this article, we recommend strength, balance and cardiovascular exercises that can be done as part of a three-month training plan. While that might initially sound like a lot of work, most of the exercises mentioned here are simple and can be done in your home or around your neighborhood.

In this article we’ll look at:

  • Benefits of training for hiking
  • Strength training exercises for hiking
  • Balance training exercises for hiking
  • Cardiovascular exercises to prep for hiking
  • A sample 3-month hiking training plan

Before beginning any new workout routine, we always recommend that you check in with your doctor.

Benefits of Training for Hiking

a hiker walking along a downed tree on a water crossing

One of the wonderful things about hiking is how simple it is: With a quality pair of shoes and sense of adventure, you can be on your way into the wilderness. But, don’t underestimate how strenuous hiking can be and the toll it can take on your body. By training for a season full of hiking or an ambitious multiday adventure, you’re likely to experience a couple of noticeable benefits:

You’ll have more fun: When you’re in shape for hiking, you’ll feel strong and be able to move more swiftly, which will allow you to enjoy the beautiful sights, sounds and smells of the outdoors rather than suffering through your trek.

You’ll put less strain on your body: When your muscles, ligaments and tendons are strong and well-tuned, they’ll be ready to respond if you stumble or slip on the varied terrain of the trail.

In addition to being physically prepared for hiking, you need to make sure you always carry the appropriate gear for a day on the trail. Touch up on the Ten Essentials before heading out the door.

Strength-Training Exercises for Hiking

Strength-training exercise that works on developing core strength can help you with overall fitness and balance for traveling on the uneven terrain of a trail. Here you’ll find a list of exercises that are ideal for hikers and can be done in your home or outside. After familiarizing yourself with them, check out our sample training schedule (located at the end of this article) with recommendations on how to incorporate each exercise into a three-month training plan.

example of how to do mountain climbers to train for hiking

Mountain climbers: This total-body workout strengthens your core, back, arms and legs. Start by getting in the push-up position and bringing your right foot forward so it nearly touches your right elbow. In one motion, switch your legs by extending your right leg back and bringing your left leg forward so it nearly touches your left elbow. Continue switching your legs back and forth quickly for 30 seconds. You can modify this workout to make it more challenging by using gliders or furniture moving pads under your feet. Doing so will engage your lower abs more than standard mountain climbers.

demonstration of how to do hip bridges to train for hiking

Hip bridge: This exercise strengthens your abs, butt, hips and lower back. Lie on your back with your arms by your sides. Bend your knees so your feet are flat on the ground and underneath your knees. Raise your hips by pushing up through your heels so that your body forms a straight line from your knees to your shoulders. Lower back down to the starting position and repeat for 30 seconds. Focus on tightening your abs and glutes while raising and lowering. You can modify hip bridges to make them more challenging by lifting one leg off the ground and extending that foot straight out in front of you.
demonstration of doing a russian twist movement to train for hiking

Russian twists: This is a great ab workout. Get down in a sit-up position. Raise your back of the ground so that it forms about a 45-degree angle with the floor. Now twist your torso as far as you can to the right and then as far as you can to the left. Repeat for 30 seconds. To make the exercise more difficult you can lift your feet about 6 inches off the ground and hold a weighted object straight out in front of you, like a medicine ball or weight plate.

demonstration of a forearm plank, a good strength exercise to train for hiking

Forearm planks: This simple exercise helps build strength in your core, shoulders, arms and legs. To do a plank, get in the push-up position, but bend your elbows so that you’re resting on your forearms. Keep your body as straight as possible and focus on keeping your abs and glutes clenched for 30 seconds. For a more-challenging modification, place your forearms on an exercise ball and use the ball to support most of your body weight.

example of proper side plank form, a great exercise for training for hiking

Side plank: An alternative to the standard plank, side planks strengthen your abs and side muscles. Lay down on your right side with your legs extended. Place your right elbow directly under your right shoulder and support yourself on your forearm. Clench your abs and lift your right hip off the ground. Hold for 30 seconds. Switch sides and repeat.

demonstration of how to do a superman strength exercise for training for hiking

Supermans: This exercise strengthens your abs and lower back. Lie down on your stomach with your arms extended straight out above your head and your legs straight out below you. Simultaneously lift your arms, chest and legs off the floor about 6 inches (and imagine you’re Superman flying through the air). Hold this position for a couple seconds, then slowly lower back down to the starting position. Repeat for 30 seconds. As you progress, you can increase the difficulty a bit by lifting an opposing arm and leg (e.g. right arm, left leg), then lower them while simultaneously lifting your other arm and leg. Continue this motion as quickly as possible for 30 seconds. This variation is often called the swimmer exercise.

example of how to do a squat with overhead press using an exercise ball

Exercise ball squat with overhead press: To do this exercise, you need an exercise ball and two 5-pound dumbbell weights. Grab a weight in each hand and hold them at your shoulders with bent elbows, then place the exercise ball between your lower back and the wall. Position your feet slightly forward of your body and shoulder-width apart, then roll your back down the ball as you lower your body toward the floor until your knees reach a 90-degree bend. As you’re doing this, extend your arms so the weights are above your head. Then stand back up, while at the same time bringing the weights back to shoulder height. Repeat for 30 seconds. You can increase the dumbbell weight, but your focus should always be on doing the proper movements, not lifting lots of weight.

After a training session, it’s a good idea to do some light stretching and/or foam rolling.
Balance Exercises for Hiking

The exercises listed below are designed to strengthen your legs and ankles and improve balance and proprioception (your body’s ability to know its position in space and react with proper movement). On the trail, this can result in better agility and coordination when you’re stepping over logs, landing on uneven surfaces or reacting to a sudden slip.

Some of these exercises incorporate a soft surface to simulate a trail, which can increase difficulty and make your stabilizing muscles work harder. A soft surface can be anything from a yoga mat to a sandy beach. As with the strength-training exercises, see our sample training schedule for information on how to integrate balance exercise into a three-month workout routine.

example of how to do a standing single-leg balance

Standing single-leg balance: Stand upright with your feet together on a solid, level surface, then lift one foot about six to 12 inches off the ground. Keep your hips level and hold for 30 seconds then switch legs and repeat. For more challenge, stand on a soft surface or the squishy side of a BOSU® balance trainer. This can be difficult at first, so if you need to extend your arms to improve your balance, do so.

demonstration of a step back to balance move for training for hiking

Step back to balance: Start by standing upright with your feet together and take one big step backward. Keep your torso upright and use your core muscles to slowly and steadily bring your other foot back to match the first one while maintaining your balance. Now step back with the other foot. Repeat for 30 seconds. As you improve, you can add more challenge by doing this exercise on a soft surface, such as grass or sand.

example of a jump squat for improved balance for hiking

Jump squats: Start with your feet shoulder-width apart and then squat down until your thighs are at least parallel with the ground. Focus on keeping your chest up, your feet flat and your knees over your toes. As you come up from the squat, push through heels and explode up and jump a few inches off the ground. When you land, do so softly and immediately go into another squat. Repeat for 30 seconds.

demonstration of jumping off a box jump onto a soft surface

Jump down to soft surface: Find a set of stairs and place a yoga mat at the bottom to create a soft surface. Then stand on the second or third step and jump off, landing on the mat in a soft, controlled manner with both feet at the same time. Let your knees flex to absorb the landing. Return to the starting position and jump again. Repeat for 30 seconds.
example of a lunge off a step for improved balance for hiking

Lunge off step: Stand on a step and lunge forward off the step with one leg as you drop the knee of the other leg toward the ground until both knees are bent at about a 90-degree angle. Keep your front knee directly above your ankle. Now reverse the motion to return to the starting position. As you do so, push up through the heel of your front foot to engage your glutes. From the starting position, lunge forward with your other leg. Repeat for 30 seconds.

Source: www.rei.com