💚 CHARITY ==> Here at FunFitness, we believe in giving back. That’s why, 10% of every single purchase you make with us, goes straight to Charity: Water, an organisation committed to bringing clean water to developing countries – we hope that makes you feel a little happier the next time you have a flat tyre!
👍 PORTABLE ==> Extremely small and super lightweight – Weighing in at only 71 grams, and with a length of only 17cm, FunPump will shock you or any cycling enthusiasts as it is almost as short as your iPhone X!
💪 HIGHEST PRESSURE ==> Tested to a powerful 15 Bar (210 PSI), this is the strongest compact micro-pump on the market. Suitable for all balls, bikes or even motorcycles. Have you ever seen a mini inflator that can be used on balls, a bicycle, or even a space scooter? FunPump can!
🚴 VERSATILE & EASY TO USE ==> FunPump’s professional design ensures compatibility with Presta & Schrader valves and popular tyres like 20×1.95 & 26×2.125, as well as mounting accessories to attach securely to the bike. Take with you when traveling, or when using any bike-sharing services around the world, and have complete peace of mind. It comes with an online manual and fun quiz sent via email. So make sure you get our email after buying
🛡️ DURABLE ==> Superior quality CNC machined aluminium alloy making this tool kit set precise and reliable – THIS PUMP IS BUILT TO LAST! 🌟 FIRST CLASS CUSTOMER SERVICE ==> 100% positive seller feedback speaks for itself. We know you’re busy, so we get straight to the point with the very best products and customer service – or your money back! Add FunPump to cart and enjoy the FunFitness customer experience phenomenon!
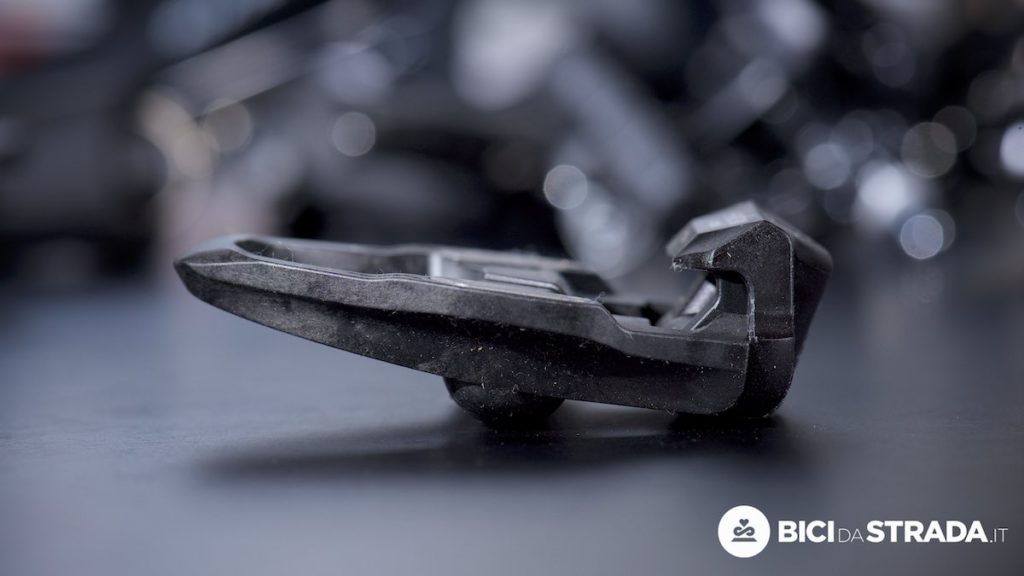
TOP-NOTCH ERGONOMIC DESIGN ==> Lever with chamfered tip to easily insert beneath the bead and spoke hook to keep the lever in place. Bold shape helps to maintain & remove the tightest tyres easily for anyone. No more painful hand to fix a flat tire or replace wheel rim.
DURABLE ==> Proprietary molded plastic blend. Tough like a metal chisel. FunLever is a must-have removal & repair & patch multi tool kit for cyclists.
LIFE TIME WARRANTY ==> We will send you a new set immediately if any item is broken. All Fun Fitness products are backed by hassle free replacement policy. Purchase these cycling components with peace in mind!
COMPLETE BUNDLE ==> Get up to 15% discount when buying 2 or more FunFitness products like an inflator, a tyre pry, caps, changers or any other bicycling multifunction parts. Please check the ‘Special Offers and Product Promotions’ section for more information. Suitable for a large number of tire like michelin and vittoria.
PORTABLE & EASY TO STORE ==> Three 4.9 ” inch light & tiny leavers can be clipped together so that you can find them easily and carry on while riding. This function makes these changing accessories stand out from their alternative shifter. The crazily low holiday price is so unique and unsual that it’s even better than other lightning deals. Buy this cool gift for your gentleman, dad, husband, male friend, son or grandson today!
💚 CHARITY ==> Here at FunFitness, we believe in giving back. That’s why, 10% of every single purchase you make with us, goes straight to Charity: Water, an organisation committed to bringing clean water to developing countries – we hope that makes you feel a little happier the next time you have a flat tyre!
👍 PORTABLE ==> Extremely small and super lightweight – Weighing in at only 71 grams, and with a length of only 17cm, FunPump will shock you or any cycling enthusiasts as it is almost as short as your iPhone X!
💪 HIGHEST PRESSURE ==> Tested to a powerful 15 Bar (210 PSI), this is the strongest compact micro-pump on the market. Suitable for all balls, bikes or even motorcycles. Have you ever seen a mini inflator that can be used on balls, a bicycle, or even a space scooter? FunPump can!
🚴 VERSATILE & EASY TO USE ==> FunPump’s professional design ensures compatibility with Presta & Schrader valves and popular tyres like 20×1.95 & 26×2.125, as well as mounting accessories to attach securely to the bike. Take with you when traveling, or when using any bike-sharing services around the world, and have complete peace of mind. It comes with an online manual and fun quiz sent via email. So make sure you get our email after buying
🛡️ DURABLE ==> Superior quality CNC machined aluminium alloy making this tool kit set precise and reliable – THIS PUMP IS BUILT TO LAST! 🌟 FIRST CLASS CUSTOMER SERVICE ==> 100% positive seller feedback speaks for itself. We know you’re busy, so we get straight to the point with the very best products and customer service – or your money back! Add FunPump to cart and enjoy the FunFitness customer experience phenomenon!
Hoy en día hay cada vez más gente que se compra bicicletas. Aunque mucha gente sólo las quiera como alternativa ecológica para desplazarse, sorprendentemente poca gente aprovecha todos los beneficios del ciclismo, sobre todo en cuanto a perder peso.
Si todavía no conoces los beneficios para la salud del ciclismo, te encantará saber que la lista es extensa: el ciclismo te ayuda a quemar el exceso de grasa, reduce el riesgo de diabetes y enfermedades cardiovasculares, ayuda a la memoria y te proporciona un descanso profundo y de calidad, entre otros muchos. Así que, ¿cómo puedes conseguir todos estos beneficios y que además se reflejen en tu línea? Aquí tienes cinco consejos para ayudarte a perder peso con la bici:
1. TOMA UN DESAYUNO COPIOSO ANTES DE IR EN BICI
Nada activa mejor el metabolismo que un desayuno saludable y copioso. Aunque la idea de tomar un buen desayuno para perder peso suene contradictoria, saltarte el desayuno hará que tu cuerpo queme músculos y almacene grasa. Saltarte una comida hace que el proceso metabólico se frene por lo que pueda venir después y, la mayoría de las veces, esto se traduce en el almacenamiento de grasa, que es lo que tanto tememos.
2. EVITA COMER MIENTRAS PEDALEAS SI NO ES NECESARIO
Comer una cantidad adecuada de comida en los momentos adecuados te ayudará a pedalear bien y a evitar problemas estomacales en tu salida en bici. El American College of Sports Medicine (ACSM) recomienda una ingesta de 30 a 60 gramos de carbohidratos por hora de ejercicio. Lamentablemente sólo unos pocos atletas conocen la razón de esta recomendación. Una persona media sólo puede procesa 1 gramo de carbohidratos por minuto, independientemente de cuánto se consuma. Así se formará un atasco en los intestinos, que sólo lleva a que la glucosa de lo que comes se traspase a la sangre a un ritmo más lento. Tomar más carbohidratos no acelerará la absorción, sino que aumentará el riesgo de un estómago con malestar, que es lo último que queremos conseguir, especialmente cuando vamos en bici.
3. NO TE PASES CON LA ROPA
Que no te tiente el llevar una equipación muy refinada para salir en bici porque no es necesario. Lo que te funcione para ir de esquí, patinaje sobre hielo o para pasear al perro te valdrá para el ciclismo también. Una buena regla general es vestirse a capas y tener en cuenta que el algodón no va muy bien. Básicamente con cinco minutos en bici empezarás a notar mucho más calor del que te esperabas. Incluso empezarás a transpirar, así que abrigarte demasiado es algo a evitar. Vestirse a capas te ayudará a adaptarte en caso de que te hayas pasado con la ropa. La telas sintéticas o de lana te mantendrán caliente incluso cuando sudes.
4. COME VERDURAS Y PROTEÍNA MAGRA
Una solución obvia y fácil para quien quiera perder peso yendo en bici. Las verduras de hoja verde son grandes fuentes de ácido fólico, que ayuda a la producción de glóbulos rojos. Así mejorarás tu salud en general y el ciclismo se te hará más liviano. Las mantequillas de frutos secos, como la de almendras o cacahuetes, son una excelente fuente de proteína magra y poner un poco de ellas en una rebanada de pan es una forma genial de llenarte de energía antes de salir en bici. Una ración de carne blanca, como de pescado o pollo, también es una buena forma de proveer al cuerpo de la cantidad de proteína que necesita para una larga sesión de bici.
5. AHORRA ESFUERZOS PARA EL FINAL Y USA LA BICI PARA DESPLAZARTE
Algunos estudios han demostrado que el consumo de oxígeno después del ejercicio puede ayudarte a librarte de las reservas de grasa. La clave es forzar al cuerpo a darlo todo haciendo unos últimos esfuerzos finales. Así animarás al cuerpo a seguir consumiendo oxígenos, incluso después de la salida en bici. Esto ayuda al cuerpo a quemar aún más grasa. Como refuerzo, las bicis de ejercicio te ayudan a perder peso después de una larga salida en bici.
Además, ¿has pensado alguna vez en ir en bici al trabajo en lugar de coger el coche? Esto te ayuda a usar mejor tu tiempo y no tienes que preocuparte de cuándo hacer ejercicio cuando tienes la agenda tan apretada.
Sono finite le Feste, ci siamo lasciati alle spalle il Natale e il Capodanno, le cene coi parenti e con i colleghi, quelle con i compagni di squadra, con gli amici, con il circolo di bocce. Abbiamo dato il meglio di noi stessi in cucina e poi a tavola, non abbiamo risparmiato al nostro corpo grassi, zuccheri e alcoolici e adesso, saliti sulla bilancia, ci viene rivelata la spietata verità: siamo aumentati di peso.
Per fortuna la nostra amata bicicletta può aiutarci a rimetterci in forma in breve tempo, basta seguire questi 8 consigli.
Possono bastare 20 minuti per fare la differenza. Secondo uno studio del Journal of Applied Physiology il nostro corpo brucia più grasso quando abbiamo fame rispetto a quando siamo sazi. Si tratta di un trucchetto adottato anche dai ciclisti professionisti da decenni che, generalmente, non possono sedersi a tavola se prima non hanno fatto andare le gambe per almeno 20 minuti.
Mangia in modo corretto per andare più forte in bici, ma soprattutto per vivere meglio. Iscriviti al nostro corso Bikeitalia di Alimentazione per il Ciclismo: clicca qui
Dacci dentro
Lavorare sodo è il modo migliore per rimettersi in forma in tempi brevi. Possono bastare 30 secondi con un rapporto lungo con la massima frequenza possibile per aumentare i livelli dell’ormone della crescita (che aiuta a potenziare la muscolatura magra e a bruciare i grassi) di circa il 530 per cento. Da altre ricerche pubblicate sul Journal of Applied Physiology emerge che dopo solo due settimane di allenamenti in bici a giorni alterni aumenta la capacità del ciclista di bruciare grassi del 36%. Lavorare su brevi sprint velocizza il metabolismo così da continuare a bruciare grassi anche sotto la doccia dopo aver essere scesi di sella. Ricerche dell’Università di Laval rivelano che anche se gli sprinter bruciano la metà delle calorie durante l’allenamento rispetto ai fondisti (che bruciano più calorie), nel lungo periodo bruciano fino a 9 volte più grassi.
Usa vestiti attillati
Il modo in cui ti vesti non ti aiuterà di certo a perdere peso, ma guardandoti allo specchio ti renderai più facilmente conto della tua forma fisica: questo ti servirà da promemoria per la prossima volta in cui ti sederai a tavola. Uno studio realizzato dall’Università di Cornell sui carcerati evidenzia come i vestiti ampi impediscano di percepire i cambiamenti del proprio corpo. Per chi va in bici non esiste nulla come un completo in lycra da ciclista per percepire anche il minimo cambiamento.
Abbandona l’asfalto
Un’ora di bici su un percorso dal fondo sconnesso fa bruciare oltre 600 calorie, più di quanto non faccia pedalare per lo stesso tempo su una strada asfaltata e in più sollecità tutti i muscoli del corpo, non solo le gambe. Spingere su rocce, radici e tronchi aiuta a rafforzare e modellare i muscoli delle braccia, della schiena, del petto e delle spalle.
Vai a caccia di salite
Pedalare in salita fa bruciare molte calorie in poco tempo e in più aumenta la resistenza. Trova una salita di 10 minuti e percorrila in una serie di tre ripetute alternando le posizioni: seduti in sella e in piedi sui pedali in modo da trascorrere la metà del tempo seduti e la metà del tempo in piedi. Pedalare in piedi non solo aumenta il battito cardiaco (che fa bruciare maggiori calorie) ma aiuta anche a rafforzare e tonificare la muscolatura delle spalle, dei tricipiti e del tronco.
Usa la bici per spostarti
Andare in giro in bici (anche solo per brevi tratti in città) non richiede più tempo che sedersi in macchina, accendere il motore, partire, arrivare a destinazione e cercare parcheggio, però aiuta a perdere peso. Uno studio ha scoperto che il ciclista urbano medio perde oltre 5 kg di peso nel primo anno di attività senza restrizioni alla dieta e senza ulteriore esercizio fisico.
Mangia mentre pedali
Andare in bici è una delle poche attivitàche consentono di mangiare mentre si pedala. Come può aiutarti a perdere peso? Perché ti permette di mangiare esattamente quello che ti serve, quando ti serve, senza abbuffarti prima o dopo l’allenamento. La prossima volta che esci per fare un lungo giro in bici porta con te barrette energetiche, una banana e altro cibo tascabile in grado di fornirti tra le 200 e le 250 calorie all’ora. Anche in questo caso finirai il tuo allenamento in riserva, ma almeno avrai una sensazione di fame ancora controllabile. Questo ti permetterà di mangiare in modo normale durante la giornata e di perdere peso col tempo.
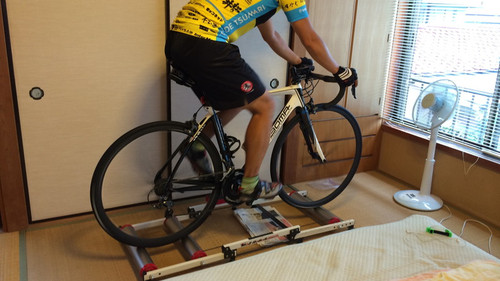
Sostituisci il divano con i rulli
La persona media guarda quasi tre ore di televisione al giorno. Procuratevi dei rulli per montare la bicicletta, portate tutto in soggiorno e pedalate mentre vi godete i vostri programmi preferiti in prima serata. Potete anche pedalare in modo blando senza sudare: in una serata fanno circa mille calorie, se lo fate almeno tre o quattro volte per settimana può significare anche mezzo chilo in una sola settimana.
Si vous pensez que passer des heures à faire de l’aérobic ou dans des salles de gym pour perdre du poids est assez triste, revenez à la nature et pédalez pour garder la forme, dans votre environnement. Il n’existe pas de nombre de kilomètres précis pour perdre du poids. Votre perte de poids dépend de la fréquence à laquelle vous faites du vélo, de l’intensité avec laquelle vous pédalez, de votre poids de départ et de votre régime alimentaire.
Comment atteindre vos objectifs de perte de poids
Il ne suffit pas de faire du vélo une fois pour perdre du poids. Ce sont la durée et la régularité qui comptent. 500 grammes de graisse correspondent à 3500 calories, donc, si vous ne suivez pas un régime, vous devrez brûler 3500 calories par semaine pour perdre 500 grammes de poids. En associant le vélo à d’autres types d’exercice physique et en accroissant votre niveau d’exercice physique en général vous pourrez atteindre votre objectif.
Les calories que vous brûlez
Plus vous pesez et plus vous avez besoin d’énergie pour déplacer votre corps, ce qui veut dire que les gens plus lourds font dépensent plus d’énergie en bougeant. Selon les Harvard Health Publications, une personne pesant 56 kg qui roule à une vitesse de 19 à 22 km/h brûlera environ 240 calories toutes les 30 minutes, tandis qu’une personne qui pèse 83 kg brûlera 355 calories. Si vous augmentez votre vitesse à 22-25 km/h, vous pourrez brûler 300 calories pour un poids de 56 kg et 444 calories pour un poids de 83 kg.
Objectifs journaliers
Si vous faites du vélo pendant 30 minutes par jour, 5 jours par semaine, vous pouvez perdre 1500 calories si vous pesez 56 kg et si vous roulez à une vitesse de 24 km/h. Si vous n’arrivez pas à rouler si vite, vous brûlerez 1200 calories par semaine en roulant à 19 km/h. Vous pourrez arriver progressivement à ce niveau d’effort et, si vous éliminez des calories de votre régime alimentaire habituel, vous pourrez consacrer moins de temps par semaine au vélo. Si vous avez des vertiges ou vous vous sentez fatigué(e), diminuez votre niveau d’activité et demandez toujours conseil à votre médecin avant de faire du vélo.
Beim Fahrrad fahren bringt du deinen Stoffwechsel in Schwung
WIESO IST DAS FAHRRAD ZUM ABNEHMEN BESONDERS GEEIGNET?
Weil diese Sportart gelenkschonend ist. Wenn du im Sattel sitzt, trägt der Sattel 60 bis 75 Prozent deines Körpergewichts, was wiederum deine Beingelenke entlastet. Training auf dem Fahrrad ist aus diesem Grund für übergewichtige und wenig trainierte Personen der ideale Einstieg. Beim Fahrradfahren straffst du deine Muskeln gerade in den häufigen Problembereichen Bauch, Beine, Po. Mehr Muskeln verbrauchen mehr Kalorien, der Kalorienumsatz steigt und dadurch verlierst du deine überflüssigen Kilos. Vorteile des Radfahrens:
du kannst gesund abnehmen
das Lungenvolumen erhöht sich
das Immunsystem wird gestärkt
Fahrradfahren ist gelenkschonend
das Risiko einer Herz-Kreislauf-Erkrankung ist bei Radfahrern um bis zu 50 Prozent geringer, als bei weniger aktiven Menschen.
Fahrrad fahren ist das perfekte Bauch-, Beine-, Po-Training
ABNEHMEN MIT DEM FAHRRAD: DURCH REGELMÄSSIGKEI
Versuche mehrmals pro Woche aufs Fahrrad zu steigen und fahre dann kürzere Strecken. Dadurch purzeln deine Pfunde schneller, weil du den Nachbrenneffekt besser nutzen kannst. Drei Mal in der Woche etwa 30 bis 40 Minuten zu radeln reicht vollkommen für den Einstieg. Fahre anfangs keine große Übersetzungen, um die Knie zu schonen. Eine Kadenz von 90 bis 100 Umdrehungen pro Minute ist für Anfänger ein idealer Wert.
Welches Fahrrad eignet sich zum Abnehmen?
WELCHES FAHRRAD ZUM ABNEHMEN?
Wenn du zu den Menschen gehörst die es partout nicht vor die Tür treibt, kannst du natürlich ein Heimrad oder einen Ergometer nutzen. Aber unterschätze nicht, welchen Genuss das Biken bereit wenn du einmal über den (zugegebenermaßen vielleicht schwierigen) Anfang hinaus bist. Das echte Gefühl von Geschwindigkeit und Unabhängigkeit sowie das Naturerlebnis kannst du nur draußen haben. Aber welches Rad ist das Richtige zum Abnehmen? Grundsätzlich eignet sich jeder Fahrradtyp, du musst nur dasjenige finden, das dir am ehesten liegt:
Bedenke bei Rennrädern, dass diese Spezialfahrräder sind, mit denen du tatsächlich fast nur Asphalt fahren kannst. Achte darauf eine hohe Trittfreqenz zu fahren und nutze eher leichte Gänge. Am Anfang ist es auch sinnvoll, steile und lange Anstiege zu vermeiden und erstmal in der Ebene zu trainieren.
Wesentlich vielseitiger ist ein Trekkingrad, diese Räder sind für Touring optimiert und nicht auf Asphalt beschränkt. Forstwege, Schotter usw. sind kein Problem. Trekkingräder gibt es auch verkehrssicherer Ausstattung. Damit hast du den perfekten Allrounder für den Weg zur Arbeit,die Trainingsrunde am Abend und die große Tour am Wochenende.
Ein sehr interessanter Kompromiss zwischen Touring und reinem Roadbike sind die modernen Gravelbikes.
Zieht es dich ins Gelände, ins Gebirge oder möchtest du ganz einfach die Option haben auch mal richtig grobe Strecken zu fahren? Dann ist ein Hardtail-Mountainbike deine Wahl.
ABNEHMEN MIT DEM E-BIKE?
Abnehmen mit dem E-Bike
Bezüglich der E-Bikes gibt es ein weit verbreitetes Missverständnis. Nein, ein Pedelac erspart dir nicht das Treten. Tatsächlich unterstützt der Antrieb dein Pedalieren. Du fährst einfach mit kräftig Rückenwind. Gerade für Einsteiger ist dies eine interessante Option. Zieht es dich ins Gebirge und bist du von langen, anspruchsvollen Touren faziniert? Dann ist insbesondere für Anfängner eine elektronische Unterstützung sinnvoll.
UNVERZICHTBARER ZUBEHÖR ZUM RADFAHREN
Auf den Fahrradhelm kannst du keinesfalls verzichten, eine Radhose ist sehr zu empfehlen, denn mit Schmerzen am Hintern ist der Spaß schnell vorbei. Hast du mal ein modernes Fahrradtrikot aus Funktionsmaterialien getragen, willst du darauf beim Biken nicht mehr verzichten. Das wars dann aber für den Einstieg an notwendigen Ausgaben. Die restliche Ausrüstung kannst du im Laufe der Zeit besorgen, dann weißt du auch besser was du willst.
AKE THE MOST OUT OF YOUR NEW OBSESSION WITH THESE USEFUL TIPS AND TRICKS.
If you’re new to cycling: Congrats! There are so many amazing adventures in store for you. We’re stoked to have more company in the bikes lanes, but we also understand that cycling can feel really overwhelming at first. On top of knowing the basic rules of the road, it can seem like there’s a whole set of unwritten rules out there as well. Can you wear low socks? Do your water bottles need to match? Well, we’re here to say: Forget the rules. Riding bikes should be fun, and in order for you to have the most fun out there, we rounded up the best beginner cycling tips to help you get rolling. These nine aren’t rules; they’re just suggestions and simple fixes that’ll make riding more safe and enjoyable.
1. Set Your Seat Height Right
Experiencing pain in the front of your knee? Your seat might be too low, causing you to under-extend during your pedal stroke. This is a common mistake amongst beginners because most people feel more comfortable and confident if their feet can reach the ground. But having the wrong saddle height could put you at risk for injury.
To fix: Bump up your saddle. At the right seat height, your knee should be slightly bent at the bottom of your pedal stroke, without rocking your pelvis. Measure the distance between the bottom bracket and the top of the seat. This is your seat height. It should be very close to the product of your inseam (in centimeters) multiplied by 0.883. If you need help, roll down to your local bike shop. The staff will likely be happy to set you up and share your saddle height. Then, get comfortable lifting yourself off the saddle and straddling the top tube so your feet can touch the ground as you come to a stop. It helps to lean the handlebars toward the foot you want to place down.
2. Don’t Stress About the Gear
You don’t need fancy clothes, clipped-in shoes, or a top-of-the-line bike to become a cyclist. Sure, slick equipment can be a lot of fun, but there’s nothing like smoking a bunch of high-end carbon bikes on a climb when you’re riding an old beater. The important thing is that you just get out there and ride—and worry about any potential gear upgrades later. You’ll certainly need a few things to get started (a bike and a helmet, of course), but don’t stress about dumping a bunch of money into a lot of fancy new gear.
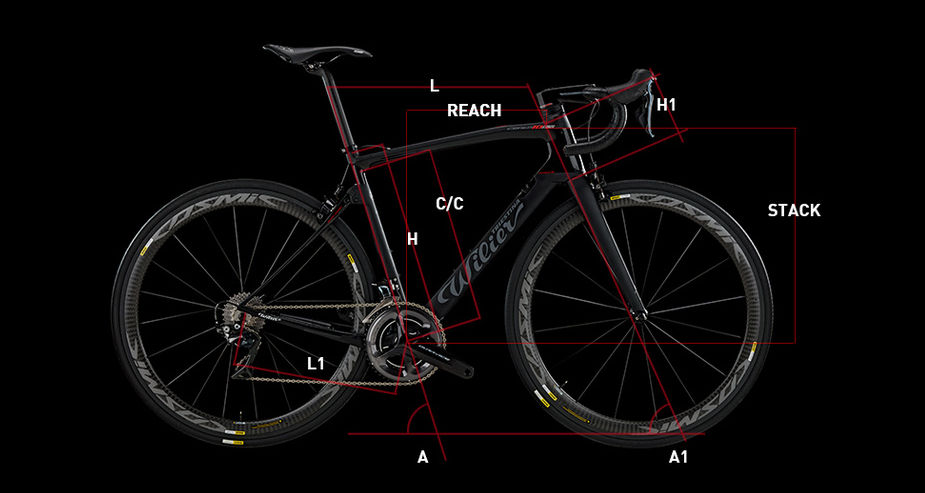
3. Get a Bike Fit
How your bike fits you is one of the most important aspects of riding. If the fit is painful, you’re not going to spend much time in the saddle, no matter how excited you are to ride that new bike. To get the right fit, two elements are key: seat height and reach. The seat height should be high enough to give you a very slight bend in your knee when your foot is at the bottom of the pedal stroke, as mentioned above. Proper reach means your arms and torso make a 45-degree angle over the bike. Too long, and your back will be sore reaching for the handlebars; too short, and your knees will be too close to your arms. When you’re shopping for a bike, make sure to take it for a test ride to see that the size is correct for you.
4. Keep Your Bike Maintained
You don’t have to be a pro wrench to take care of the basics. Routine maintenance—like lubing your chain— will not only save you a bundle at the bike shop, but it will also prolong the life of your bike and components. Keeping the recommended amount of air in your tires (look over your tire to find the psi range) makes your rides a lot easier, too, and prolongs the life of your tires. Check out these three super-easy maintenance tasks your bike mechanic wishes you’d do.
5. Avoid Doing Too Much Too Soon
One of the biggest sources of injury comes from trying to take on too much mileage before you’re ready. Build up slowly, ease in, and give your body time to adjust to new distances. Similarly, if you’re on a training ride, don’t start too fast and risk burnout and fatigue in the second half. Warm up during the first third of the ride, then settle into a rhythm for the second, and give it everything you’ve got for the final third.
6. Carry a Tube or Patch Kit
One minute you’re out there on the trail, cruising along with the perfect tailwind, having the time of your life. Then that unmistakable sound of air hissing out of your tires shatters your peaceful reverie, and the party is over. If your flat tire backup plan is to phone a friend, take a few minutes and check out this guide to changing a tube or patching one. You won’t believe how much more independent you’ll feel with the proper tools on hand—a spare, a patch kit, tire levers, and a mini-pump—and the know-how to get yourself back on the road in 15 minutes.
7. Use Your Gears
Gears are your best friends on a climb, and your greatest source of speed on a long, rolling stretch of road. But it does take a little practice to get the hang of when and how to shift into your most efficient gear. Here’s a basic guide to using all yourgears.
8. Learn How to Ride in a Group
Group rides have their own protocol and etiquette for a reason—it’s easy to cause a crash if your riding isn’t predictable. If it’s your first time riding with a new group, hang out in the back, observe, and ask for help if you need it. No question is a dumb question when your own safety and the safety of the group is at stake. For more on group-riding rules and technique, check out this article.
9. Remember to Refuel
If you’re only riding for an hour, you should have water but don’t really need to eat on the bike. If you’re planning to ride for two hours or more, bring a snack along and start eating 45 minutes to an hour into your ride. Continue to eat small amounts every 15 to 20 minutes or so. Forgetting to refuel can put your body into a deficit and cause you to bonk—or go into a hypoglycemic state. Tiredness, irritability, dizziness, nausea, confusion—it’s not a strong way to finish a ride.
Finalmente vi siete convinti. Ci stavate pensando da tempo e adesso, con le belle giornate estive, avete finalmente deciso di avvicinarvi per la prima volta alla bici da corsa. Magari per seguire il gruppo di amici, oppure per condividere questa stupenda passione con il/la fidanzato/a. Semplicemente per fare un po’ di attività fisica all’aperto oppure perché vi siete gasati a vedere le tappe del Tour de France in Tv.
Poco importa quale sia la motivazione, l’importante è avere voglia di iniziare a pedalare. Ma come cominciare? Quanti chilometri percorrere durante le prime uscite? Che bici comprare e che accessori servono? Le cose da sapere per avvicinarsi al mondo della bici da strada (e soprattutto per pedalare senza spiacevoli intoppi) sono tante. Qui di seguito ecco dieci consigli per iniziare con la bici da corsa nel modo migliore:
1 – LA PRIMA BICI
Per iniziare a pedalare con la bici da corsa non c’è bisogno di spendere una fortuna. Focalizzatevi sulla funzionalità e sul rapporto qualità/prezzo. All’inizio, a nostro avviso, potete tralasciare la ricerca smodata della leggerezza e delle ultime novità.
Con un budget tra i 900 e i 1200 euro si può acquistare un’ottima bici da corsa in alluminio, con forcella in carbonio e un gruppo (cambio, comandi, guarnitura, freni, per intenderci) funzionale e affidabile. Se volete spendere meno, il nostro consiglio è di cercare qualche prodotto usato. In questo caso si possono trovare prodotti in alluminio tra i 400 e i 650 euro, oppure telai in carbonio con una componentistica di medio livello tra gli 800 e i 1200 euro. Magari non avrete il telaio all’ultima moda o il gruppo più recente, ma con una spesa accessibile vi sarete dotati di un mezzo affidabile e funzionale. L’ideale per iniziare a pedalare senza pensieri. Per iniziare, a nostro avviso, un buon usato è la scelta ottimale.
Con 1.000 euro o poco più si possono acquistare ottime bici in alluminio, funzionali e affidabili. Per spendere meno potete optare anche per un buon usato.
Se invece volete partire già con prodotti di media-alta gamma, il mercato offre l’imbarazzo della scelta. Se però, dopo poco tempo, vi accorgete che il ciclismo non fa per voi e decidete di rivendere la bici, preparatevi a rimetterci parecchi soldi: i prodotti di alta gamma si svalutano velocemente…
2 – LA MISURA DEL TELAIO
Una scorretta posizione in sella, con tutti i dolori e le scomodità che ne conseguono, rappresenta una delle principali cause di abbandono per i neofiti, già dopo poche uscite. E’ vero, la posizione della bici da corsa e il manubrio ricurvo sono naturalmente meno confortevoli rispetto a quelle di una bici da passeggio o di una mtb. Ma la scelta della misura giusta del telaio e un corretto posizionamento in bici vi permetteranno di pedalare senza problemi.
Partiamo dalla corretta misura della bici. Se siete neofiti assoluti e non avete idea di come scegliere la taglia giusta, affidatevi a un negoziante di fiducia. La maggior parte sono professionali e competenti e sapranno consigliarvi al meglio. In alternativa, soprattutto se avete trovato qualche prodotto usato on line che vi stuzzica, chiedete consiglio ad un amico esperto: saprà sicuramente darvi qualche indicazione ed eviterà di farvi prendere qualche fregatura, anche in termini economici. Sul web, purtroppo, può capitare.
3 – LA CORRETTA POSIZIONE IN BICI
Passiamo al corretto posizionamento in bici. Per chi inizia a pedalare, magari poche volte al mese, pensiamo che non sia necessario spendere subito somme importanti per recarsi in centri di biomeccanica professionali. Un negoziante competente saprà mettervi in sella nel modo corretto. Dovete però affidarvi alle persone giuste, quindi fatevi consigliare da altri amici ciclisti. Nell’ambiente “ si sa” di chi ci si può fidare e di chi no.
I valori più importanti sono quelli di altezza sella, distanza sella-manubrio e dislivello tra sella e manubrio. Per le prime esperienze chiedete al vostro interlocutore di impostarvi in una posizione “comfort”, cioè non troppo allungata e protesa in avanti. Se dopo i primi mesi di attività vi rendete conto che la bici vi piace parecchio e che ci andate spesso, allora una visita da un buon biomeccanico può diventare opportuna. Oppure date uno sguardo al video approfondimento di seguito:
4 – SCEGLIETE IL COMFORT
Questo punto rappresenta un po’ la continuazione di quello precedente. Le prime uscite sono quelle più difficili dal punto di vista fisico, per questo, inizialmente, scegliete componenti che ottimizzino il comfort della vostra bici da corsa. Pedalare deve essere un piacere, non una sofferenza. Per l’agonismo e le sfide con gli amici ci sarà tempo…
Un copertoncino di sezione larga, meglio se antiforatura, vi garantirà maggiore comfort e più sicurezza in curva.
Scegliete copertoncini da 25 o 28 mm di sezione, che assorbono meglio le asperità dell’asfalto e garantiscono una guida più sicura. Fatevi consigliare anche una sella adattaa voi e alla larghezza del vostro bacino. Lasciate perdere, per ora, modelli superleggeri e concentratevi su quelli più confortevoli.
Anche la scelta di una sella comoda e adatta alla larghezza del proprio bacino è molto importante per pedalare con piacere già dalle prime uscite.
5 – SCARPE E PEDALI
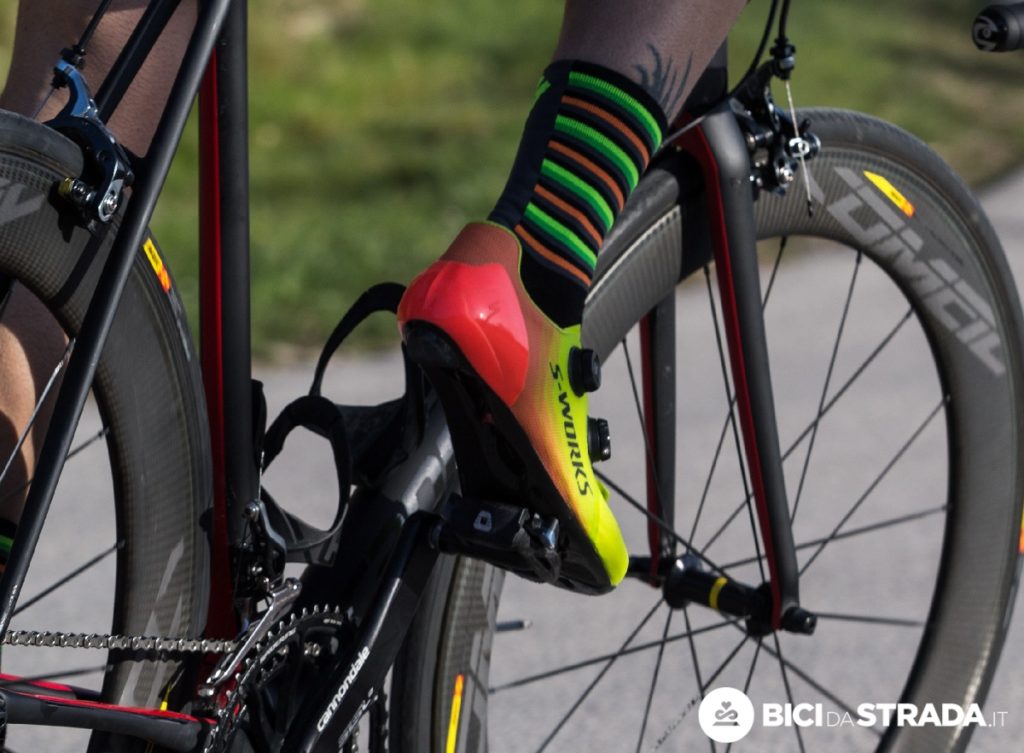
Chi sale per la prima volta su una bici da corsa, di solito, ha sempre molta paura dei pedali a sgancio rapido. Per le prime uscite potete optare anche per dei pedali flat con scarpe da ginnastica, ma a nostro avviso vi conviene provare da subito con i pedali a sgancio: il vantaggio rispetto a un pedale normale è troppo evidente e prima o poi li dovrete utilizzare.
Esercitatevi un po’ intorno a casa ad agganciare e sganciare il pedale. All’inizio non è facile trovare il punto di aggancio corretto e, soprattutto, ricordarsi di sganciare muovendo il tallone verso l’esterno. Durante le prime uscite cercate di stare concentrati sul movimento da fare. Dopo il primo mese di utilizzo diventerà un meccanismo del tutto automatico. Se, invece, venite dalla mtb, il movimento lo conoscete bene. In questo caso potrete optare anche per l’utilizzo di un pedale da mtb, così da non dover acquistare un nuovo paio di scarpe. La superficie d’appoggio non è esattamente la stessa, ma per iniziare vanno benissimo.
Il pedale a sgancio rapido offre un grande vantaggio in fase di pedalata. All’inizio però esercitatevi un po’ con il meccanismo di aggancio e sgancio. Dopo qualche uscita tutto vi verrà naturale.
6 – ABBIGLIAMENTO E ACCESSORI
Un buon pantaloncino con fondello è assolutamente necessario per evitare di tornare con dolori tremendi e con la voglia di buttare la bici dalla finestra. Privilegiate le salopette al pantaloncino semplice, perché il fit è nettamente migliore. Se il budget per gli accessori è limitato, investite qualcosa in più proprio sulla qualità della salopette e del fondello. Poi sono indispensabili una maglia intima traspirante, il casco e gli occhiali.
Il casco è un accessorio indispensabile per la sicurezza. Gli occhiali sono utili, oltre che per il sole, anche per proteggersi dagli insetti.
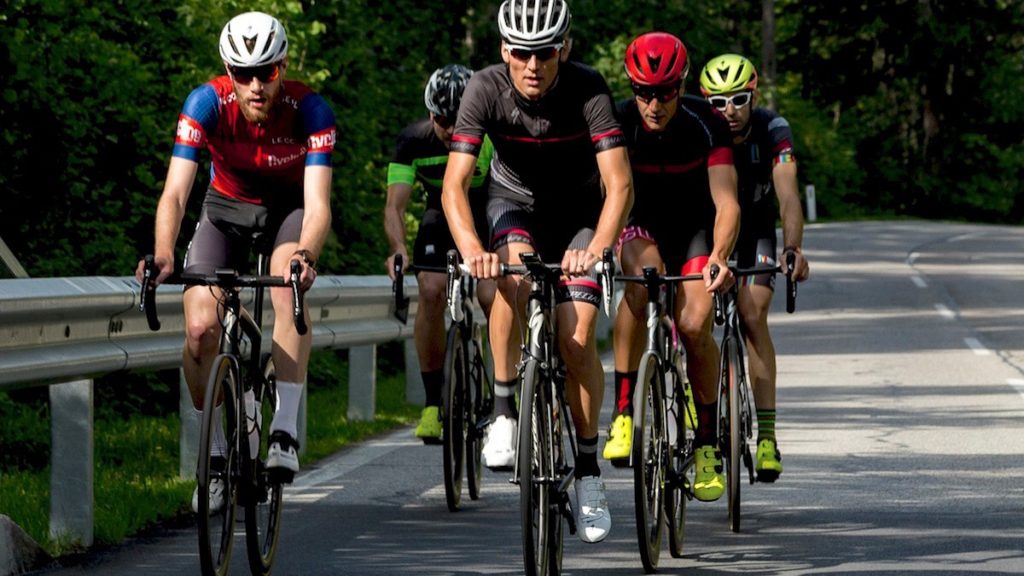
7 – LE PRIME USCITE, DA SOLI O IN GRUPPO?
Se volete sopravvivere alle prime uscite, evitate di uscire in gruppo…
Stiamo scherzando, ovviamente, ma neanche tanto.
Ricordatevi che i ciclisti sono dei “volponi”.
Diffidate da quelli che vi dicono: “dai, vieni con noi che si va piano e si torna presto”. Come minimo vorranno mettervi alla prova e vi faranno sputare il sangue, col rischio che appena tornati a casa il primo pensiero sarà quello di segare la bici… Se volete uscire in gruppo, cercate di aggregarvi ad amici veramente fidati, persone che vi sapranno dare i consigli giusti. Poi ci sarà tempo per fare uscite con gruppi più numerosi e agguerriti.
Per le prime uscite meglio evitare le uscite in gruppo, a meno non si tratti di amici fidati, per evitare fatiche eccessive e ritmi troppo elevati.
Però, se proprio volete un consiglio, effettuate le prime uscite da soli. In questo modo potrete trovare il vostro ritmo, rallentare quando necessario, non esagerare con i chilometri. Partite con 20-30 km due o tre volte a settimana. Per chi è abituato a pedalare può sembrare una passeggiata, ma per chi inizia va più che bene. In ogni caso ricordate che la regola fondamentale è quella di iniziare con gradualità. Negli anni abbiamo visto tante persone abbandonare già dopo una o due uscite perché hanno chiesto troppo al loro fisico e si sono disamorate subito della bici.
Uscire da soli vi permetterà di conoscere bene il vostro fisico e aumentare gli sforzi con gradualità.
8 – I PERCORSI DA SCEGLIERE
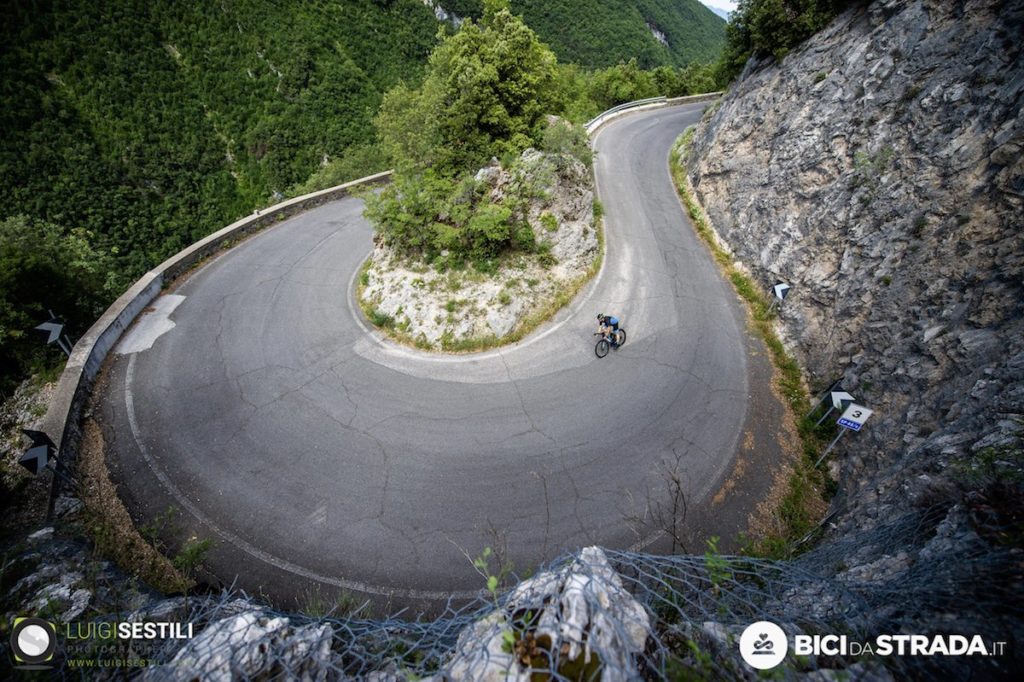
Le prime uscite sarete concentrati sulla pedalata, su come sganciare i pedali, su come funziona il cambio. Per questo vi consigliamo di scegliere percorsi con strade lontane dal traffico. Così non vi dovrete preoccupare delle auto che vi raggiungono e vi superano, pedalarete con meno stress e potrete concentrarvi solo sulla vostra uscita in bici. Durante le prime uscite, di solito, non ci si sente mai troppo sicuri, quindi meglio evitare rischi inutili. Ma questo consiglio, in realtà, va bene sempre, non solo per le prime uscite.
Per godere al massimo delle proprie uscite in bici meglio scegliere percorsi senza traffico. Sarete più tranquilli e meno stressati.
9 – FATEVI VEDERE
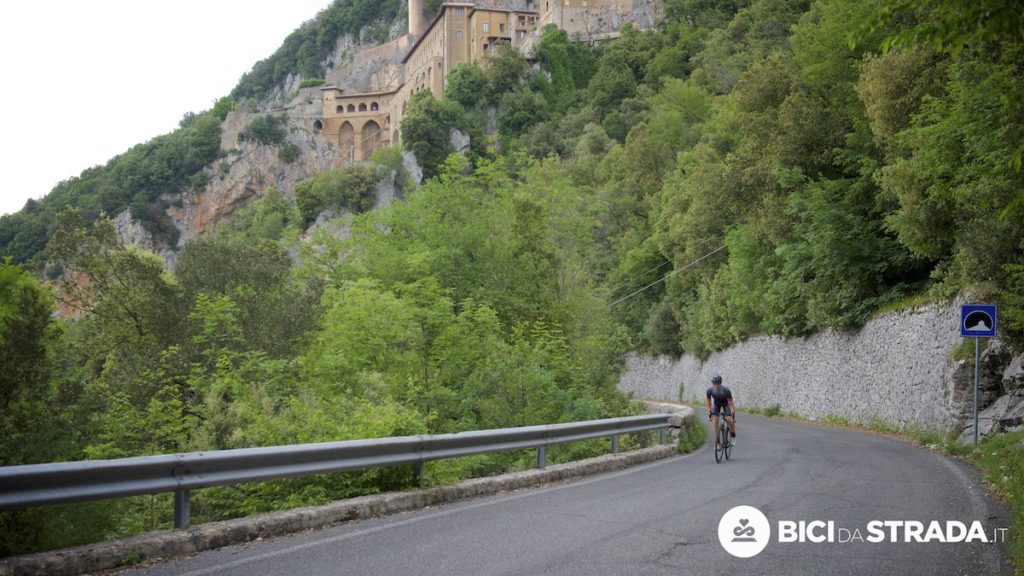
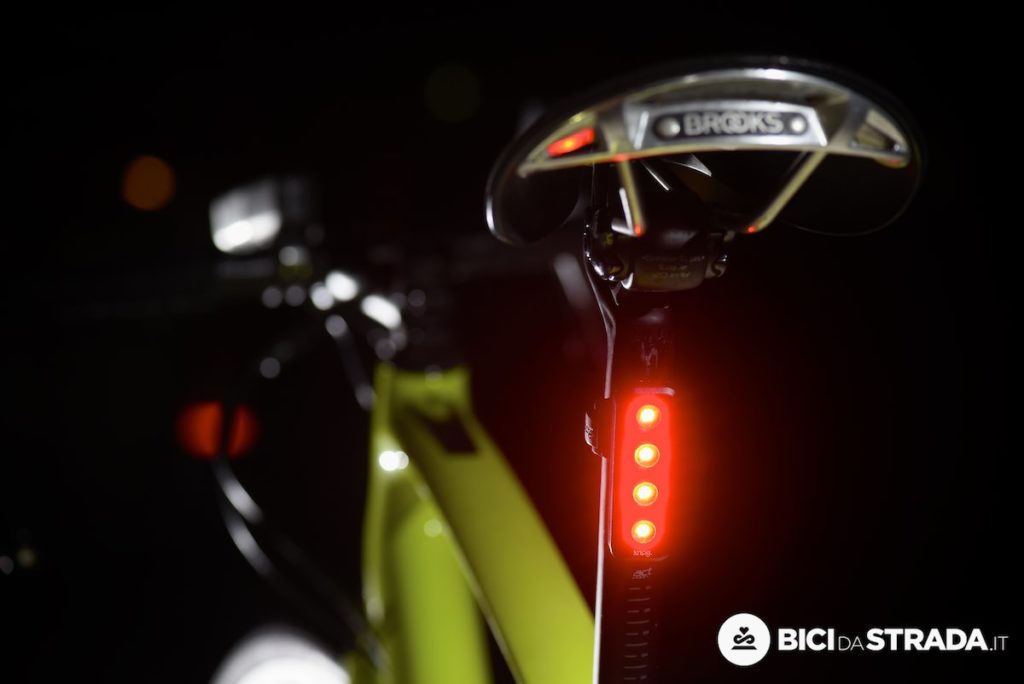
Ricordatevi sempre che su strada non siete soli. La diatriba tra ciclisti e automobilisti è ormai una costante e se ne vedono di cotte e di crude. La scelta di percorsi con poco traffico vi aiuterà a godervi meglio l’uscita, ma in ogni caso rispettate il codice della strada, cercando sempre di mantenere la destra. E rendetevi più visibili possibili. Scegliete casco e abbigliamento di colori fluo e non dimenticate una luce posteriore, meglio se lampeggiante. In questo articolo abbiamo parlato proprio di come pedalare più sicuri grazie alle luci a led.
10 – LE DRITTE DELLA “VECCHIA SCUOLA”
Concludiamo la nostra lista di consigli con qualche dritta che i ciclisti di vecchia data raccomandano sempre. Non incrociate la catena: cioè se utilizzate la corona grande sull’anteriore, non mettete gli ultimi due pignoni grandi sul posteriore. Viceversa, se usate la corona piccola sulla moltiplica anteriore, non scendete sui due pignoni più piccoli. Così la catena lavora meglio e si consuma meno
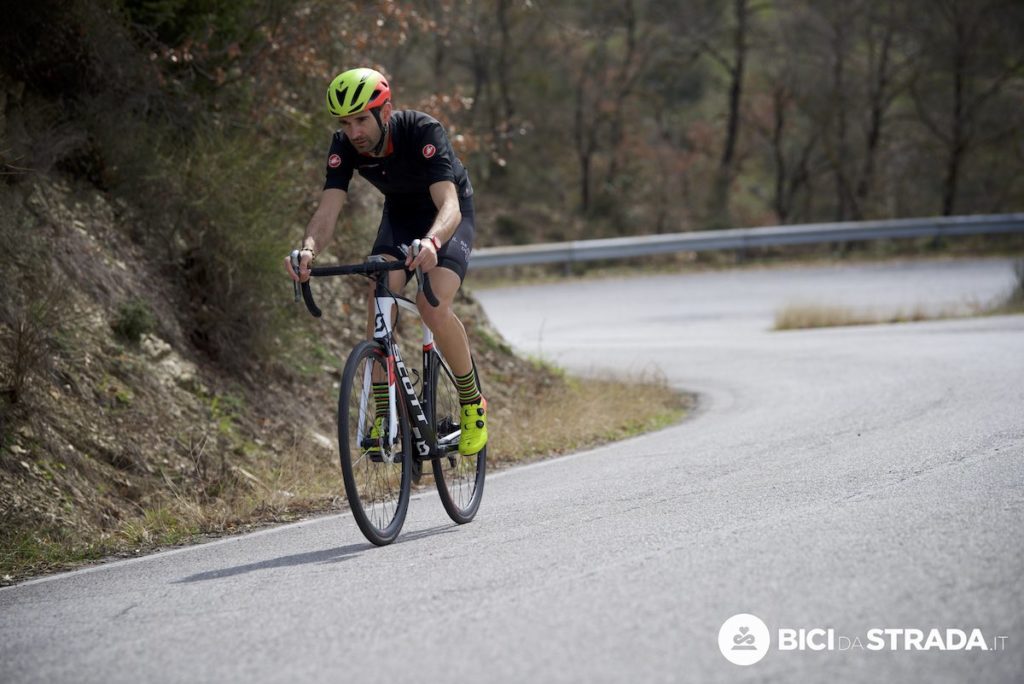
La posizione da usare per l’80% della pedalata è quella con le mani sulle leve dei freni. E’ un giusto mix tra comfort e aerodinamica e, soprattutto, si può frenare con estrema rapidità.
La posizione da usare per la maggior parte del tempo è quella con le mani sulla parte alta delle leve dei freni. E’ il giusto mix tra comfort e prestazione, ma soprattutto avrete i freni sempre a portata di mano. In discesa rigorosamente mani sotto, per un migliore controllo. Le mani sulla parte alta del manubrio meglio usarle solo in salita. Fatevi insegnare almeno come effettuare gli interventi di emergenza più banali, come saper cambiare una camera d’aria in caso di foratura.
In discesa, invece, rigorosamente mani sotto, per avere un controllo ottimale della bici.
A questo punto non resta che pedalare e divertirsi. Ricordatevi che le prime uscite, dal punto di vista fisico, saranno le più difficili. Poi scoprirete in che modo incredibile il fisico sarà in grado di adattarsi e anche voi rimarrete sorpresi dai vostri miglioramenti. Buon divertimento e benvenuti in questo stupendo mondo fatto, sì, di fatica, ma anche tanta passione, avventura, benessere e divertimento.
Ob ehrgeiziger Marathonbiker oder umweltbewusster Stadtradler: Radfahren ist und bleibt Sport. Und Sport macht einfach mehr Spaß, wenn man seine Fähigkeiten durch Training verbessert. SPORTaktiv zeigt euch, wie einfach das geht.
Natürlich wissen wir, dass es gerade unter den reinen Freizeitradlern viele gibt, die absolut „trainingsresistent“ sind – nach dem Motto: „Ich kann Rad fahren, das genügt.“ Darum haben wir hier nochmals einen Leitfaden mit 15 Trainingstipps zusammengestellt, die jeder Radbenützer – egal, wo und mit welchem Ehrgeiz er herumkurbelt – beherzigen sollte. Das Spaßpegel schnellt damit garantiert in die Höhe!
1. Prüfe deine Leistungsfähigkeit:
So einfach – so logisch: Nur wenn du weißt, was in dir drin steckt, kannst du auch erkennen, was du aus dir herausholen kannst! Gerade beim Radfahren ist bekanntlich die Skala der Belastungsmöglichkeiten eine nach oben offene. Damit also geplante Traumtouren, längere Tagesfahrten oder auch Wettkampfstarts nicht zum schmerzhaften Flop werden, solltest du unbedingt einen Leistungstest machen, um deinen Ist-Stand festzustellen und danach deine Ziele abstimmen. Beste Adresse: Sportmediziner, Sportwissenschafter, Fitnessstudio; Trainingskundige können sich auch selbst testen (Conconi & Co.).
2. Definiere deine Jahresziele:
Natürlich hat jeder begeisterte Hobbyradler ein paar Traumziele, die er erreichen möchte. Aber wie schon bei Tipp1 gesagt: Es ist allein dein Körper, der hier die Grenzen festsetzt. Mit der realistischen Einschätzung deiner Möglichkeiten (dazu gehören auch die zeitlichen Ressourcen) solltest du ganz klar deine radlerischen Ziele für 2013 definieren. Gehen diese nämlich über wöchentliche Bummelfahrten hinaus, fasst du auch längere Tagestouren oder mehr ins Auge – dann musst du auch deinen Körper darauf vorbereiten.
3. Erstelle einen Terminplan:
Das Um und Auf, damit ein Training auch Wirkung zeigt, ist die Regelmäßigkeit. Und um diese Kontinuität bei deinen radsportlichen Ambitionen zu gewährleisten, musst du deine geplanten Trainingsfahrten auch in deinem Terminkalender festschreiben. Gleich als Grundregel: Dreimal die Woche eine Stunde solltest du schon im Sattel sitzen, wenn du nachhaltig deine Leistungsfähigkeit verbessern willst.
4. Leg dir ein Tagebuch an:
Den Überblick über deine Radeinheiten, die Kontrolle deines Trainingsfleißes bekommst du am einfachsten, wenn du ein Trainingsbuch führst. Ein Stehkalender (immer in Reichweite) genügt da schon – Hauptsache, du notierst Zeit, gefahrene Kilometer und, ganz wichtig, die Intensität der Belastung sowie die Art des Trainings.
5. Ausdauer ist gefragt:
Ausdauertraining ist gerade im Radsport die Basis jeder Leistungsfähigkeit und die Grundlage für jede längere Tour. Das Gute: Auf dem Rad wird richtiges Ausdauertraining leicht gemacht. Die Formel lautet: Lange Fahrzeit bei gleichbleibend niedriger Intensität. In der Praxis sind das 2-stündige Ausfahrten im GA1-Tempo mit 90 bis 100 Kurbelumdrehungen. Übersetzt für Unkundige: GA1 ist das Rollertempo, bei dem du dich noch locker unterhalten kannst.
6. Auf die Kraft nicht vergessen:
Natürlich brauchst du auch genug „Saft“ in den Beinen. Die holst du dir mit Power-Workouts, die du ein- bis zweimal in dein Wochentraining einbaust. Such dir dazu eine gleichmäßig ansteigende Straße, die du dann mit schwerem Gang und niedriger Trittfrequenz (50 bis 60 Umdrehungen/min.) je nach Fitness 5 bis 15 Minuten lang hochkurbelst. Das Ganze machst du zwei- bis viermal, dazwischen jeweils 10 Minuten locker im Flachen ausradeln. Wichtig ist dabei, dass du ruhig und gleichmäßig bergauf trittst – wenn Oberkörper und Knie zu „pendeln“ beginnen, schaltest du auf einen leichteren Gang zurück.
7. Für Abwechslung sorgen:
Abgesehen davon, dass du vorhin angeführte Workouts in dein Training einbauen sollst: Es ist wichtig, dass du auch deine „Roller-Ausfahrten“ möchlichst abwechlsungsreich gestaltest. Such dir also immer neue Strecken, bau auch leichte Hügeln ein, fahr zwischendurch ruhig im flotteren Tempo – das alles tut Körper und Kopf gut.
8. Mit Gymnastik ergänzen:
Was leider viele Hobbyradler vergessen oder nicht wissen: Training im Sattel allein reicht nicht aus, um wirklich rundum fit zu sein. Du musst wissen: Um Power auf den Boden zu bringen, brauchst du nicht nur stramme Wadeln, sondern auch einen starken Körperkern. Denn nur dadurch ist gewährleistet, dass die ganze Kraft in vertikaler Richtung nach unten auf die Pedale geht. Die für einen stabilen Körperkern maßgebliche starke Muskulatur im Lendenwirbelbereich holst du dir mit gezielter Gymnastik für Rumpf & Rücken, die du zweimal die Woche daheim absolvierst.
9. Ruhepausen einhalten:
Eine eiserne Regel, die für jede Art von Training in praktisch jeder Sportart gilt, muss natürlich auch von den Radsportlern beherzigt werden: So ehrgeizig du auch auf ein Ziel hinarbeitest und so lang auch die geplante Mehrtagestour sein mag – bei einem Trainingsaufbau ist es ganz entscheidend, dass dein Körper auch genügend Zeit zum Erholen bekommt. Denn nur in der Regenerationsphase wandelt der Körper die gesetzten Trainingsreize in Leistung um. Daher: In der Wochenplanung gleich vorab die Ruhetage fixieren – zumindest zwei pro Woche sollten es schon sein. Gymnastik und moderates Bewegen ist natürlich auch an „Ruhetagen“ erlaubt.
10. Nicht überpowern:
Das Motto „Einbremsen“ hat bei diesem Tipp eine doppelte Bedeutung: Zum einen sollte gerade zu Saisonbeginn und auf den ersten Ausfahrten der Genuss und nicht der Ehrgeiz im Vordergrund stehen. Dein Körper braucht etwas Zeit, um sich an die neue Belastung zu gewöhnen. Und du bekommst so die Gelegenheit, um dich an das Material zu gewöhnen, dich wieder mit dem Handling vertraut zu machen. Aber „schaumgebremst“ sollte sowieso jede Ausfahrt gestartet werden. Gönn deinem Körper also zumindest 15 Minuten Einrollen im Flachen bis er auf Betriebstemperatur ist und auch du dich ans Rad gewöhnt hast.
11. Gute Partner suchen:
Beim Radfahren ist das mit der Gruppendynamik so eine Sache. Während beim Laufen das vorgegebene Tempo sehr schnell für eine natürliche Selektion sorgt, können auf einem Rad auch Schwächere über längere Zeit mithalten, obwohl sie schon am letzten Zacken dahinfahren. Was aber weder der Form noch dem Vergnügen zuträglich ist. Daher: Eine gute Radlerpartie (oder auch ein Rad-Duo) muss über einige Stunden eine homogene Einheit sein – die sich zwar gegenseitig motiviert, aber sich untereinander nicht „zu Tode hetzt“.
12. Positiv denken:
Auch dieser Tipp kann praktisch eins zu eins von den Läufern übernommen werden: Dein Kopf muss mitspielen, wenn Training erfolgreich sein soll! Anders gesagt: Mentale Schwäche ist der erste Schritt zum Hängenlassen! Der wichtigste Grundsatz aller Sportler lautet: Denk immer positiv! In der Praxis bedeutet das, dass du immer versuchst, negative Gedanken gegen positive auszutauschen. Beispiel: Denk nicht daran, wie lange du noch fahren musst – freu dich darüber, was du schon geschafft hast. Wenn die Motivation absinkt: Setz dir immer wieder neue, schnell erreichbare Ziele – die nächste Kreuzung, den nächsten Hügel, den du schaffst. Denn jedes erreichte Ziel macht dich stärker.
13. An der Technik feilen:
Ein ganz heikles Thema bei den Radsportlern ist die Fahrtechnik. Da meinen wir nicht das Bewältigen besonders kniffliger Situationen, sondern das ganz simple Sitzen und Treten – also die ökonomische Art der Kraftübertragung von den Beinen auf die Pedale und in Folge auf die Straße. „Der überwiegende Teil der Hobbyradler“, urteilt auch SPORTaktiv-Radexperte Paco Wrolich, „sitzt so auf dem Bike und tritt so in die Pedale, dass viel von der aufgewendeten Kraft nicht in Meter umgelegt wird, sondern wirkungslos verpufft.“ Wie du hier Abhilfe schaffen und an deiner Technik feilen kannst? Eine Möglichkeit ist, sich an gute Radler dranzuhängen und ihnen was abzuschauen. Die sicherste Methode: Melde dich bei einem Kurs oder Bikecamp an – dort wirst du von professionellen Instruktoren im „Runden Tritt“ und anderen nützlichen Techniken eingeschult. Apropos: Die SPORTaktiv-Radcamps sind dazu eine perfekte Gelegenheit!
14. Mut zum Radwechsel:
Einmal Rennrad, immer Rennrad? Das muss nicht so sein. Und auch eingefleischte Mountainbiker sollten zwischendurch auch einmal die Leichtigkeit des Dahingleitens erleben dürfen, wenn sie im Sattel eines Rennrades sitzen. Es ist nicht anders wie bei den Hobbyläufern, denen wir auch immer raten, ab und zu das Terrain (und die Schuhe) zu wechseln: Unterschiedliche Fahrbedingungen schulen Koordination und Gleichgewicht, es werden auch unterschiedliche Muskelpartien beansprucht. Für das „Fremdgehen“ muss man sich ja nicht gleich ein neues Rad anschaffen – vielleicht hat ja wer im Bekanntenskreis ebenfalls Lust auf einen Wechsel und macht mit bei einem kurzzeitigen „Bike-sharing“.
15. Für guten Treibstoff sorgen:
Dein Rad fährt zwar ohne ihn – du selbst aber brauchst trotzdem den richtigen „Treibstoff“, wenn dir unterwegs nicht das Gas ausgehen soll. Dieses „Auftanken“ beginnt bekanntlich schon bei einer grundsätzlich gesunden und vernünftigen Ernährung, setzt sich fort in einer Radler-gerechten Nahrungsaufnahme vor dem Start einer Tour (z. B. zwei Stunden vor der Abfahrt keine Ballaststoffe mehr) und geht dann in eine entsprechende Grundversorgung auf der Runde über. Um dem bekannten „Hungerast“ zu entkommen, gibt es jede Menge Powerriegel und -Gels, die du allerdings schon vorher auf Verträglichkeit testen sollst. Und eh klar: Alle 10 Minuten ein kräftiger Schluck aus der Trinkflasche!